Development Update – March–May 2022 Jun 3 - Tim & Pat
New 3-in-1 update and conditioner!
I’m back.
Today, you’re getting three updates in one. I’m calling it the “thicc” update and nobody can stop me.
We did say that we wanted to stick with monthly updates, and that’s still the plan, but spare time to work on Installation 01 has been limited for many of us.
For March, we intended on showing off a new armour set, but it was mid-April before we had the draft ready,
so we decided to just hold off and combine it with April’s efforts for a dual-month update.
For April, we intended on showing yet another new armour set, but it was mid-May before we had the draft ready,
so we decided to just hold off yet again and combine it with May’s efforts for an even bigger update.
May is done now, and because development progress has been absolutely chugging along, we now have three months of juicy update material for your face.
I’ll try to write a little faster next time so there isn’t such a backlog.
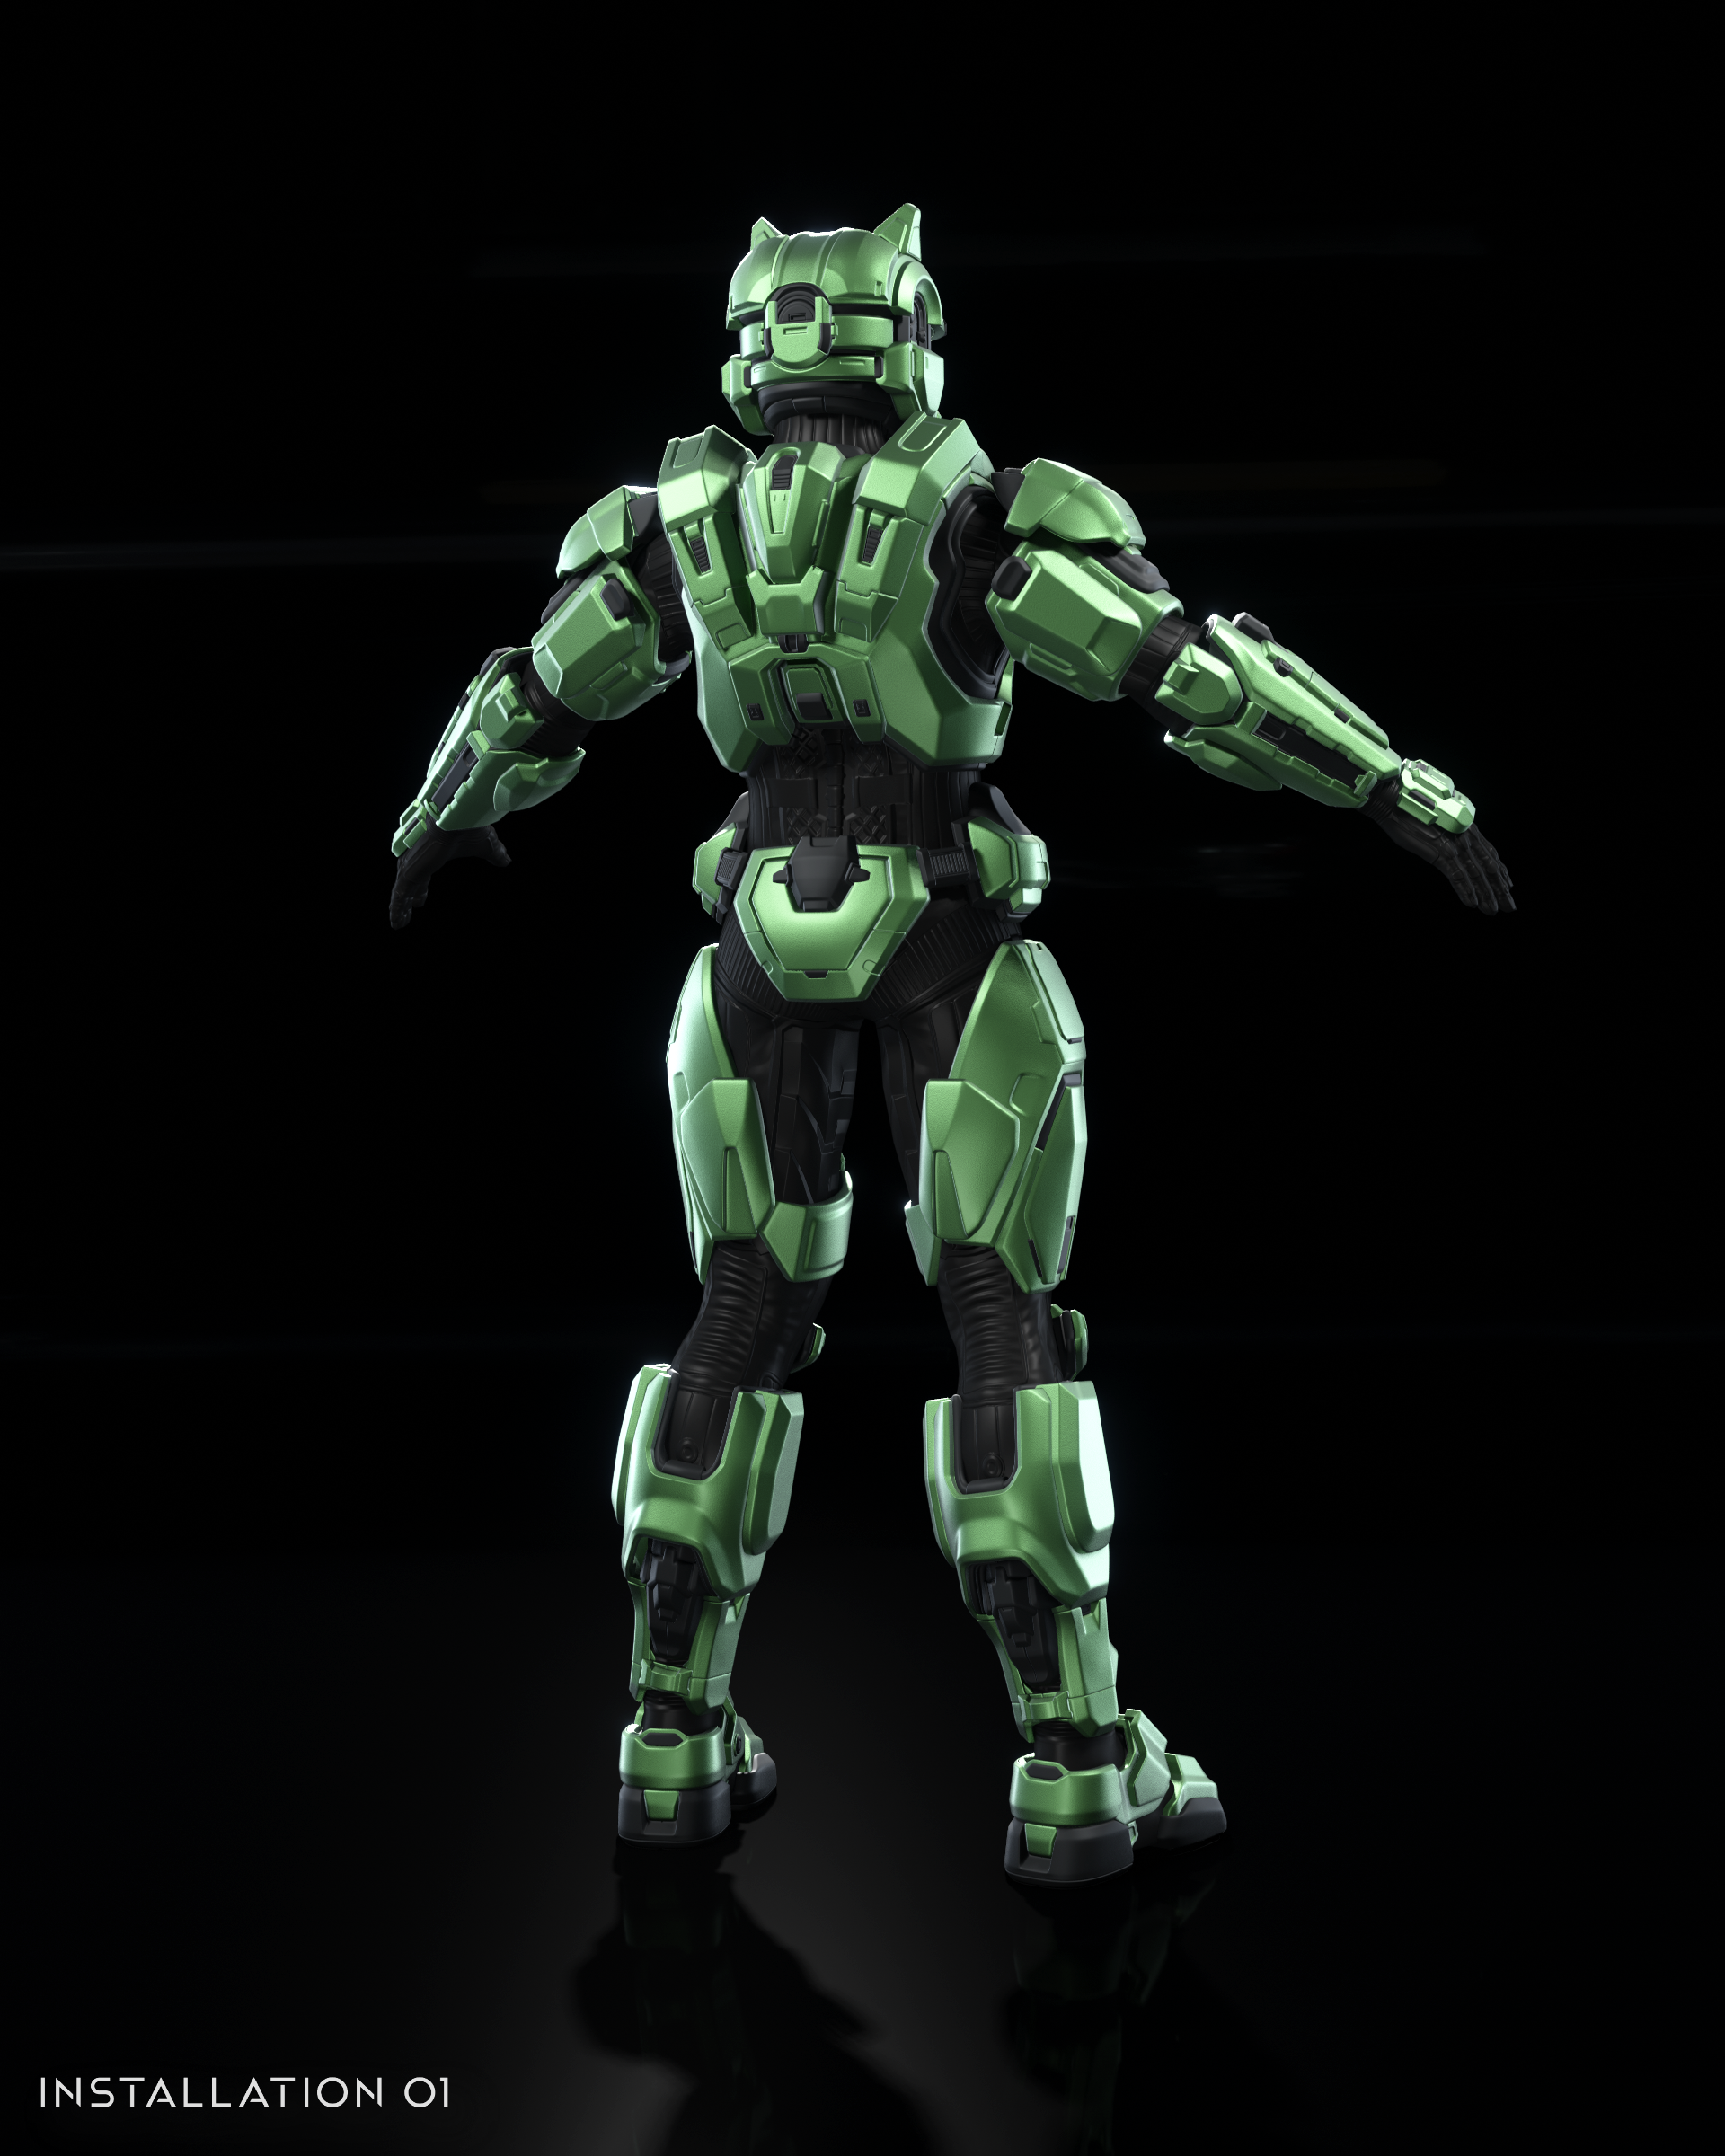
CAT EARS Owo
We’re kicking it off today by handing your attention that I stole over to one of our newest artists, Clemen. He’s here to talk to you today about armour and how it can help you on the battlefield, and by help I mean help you look stylish, of course! Take it away Clemen!
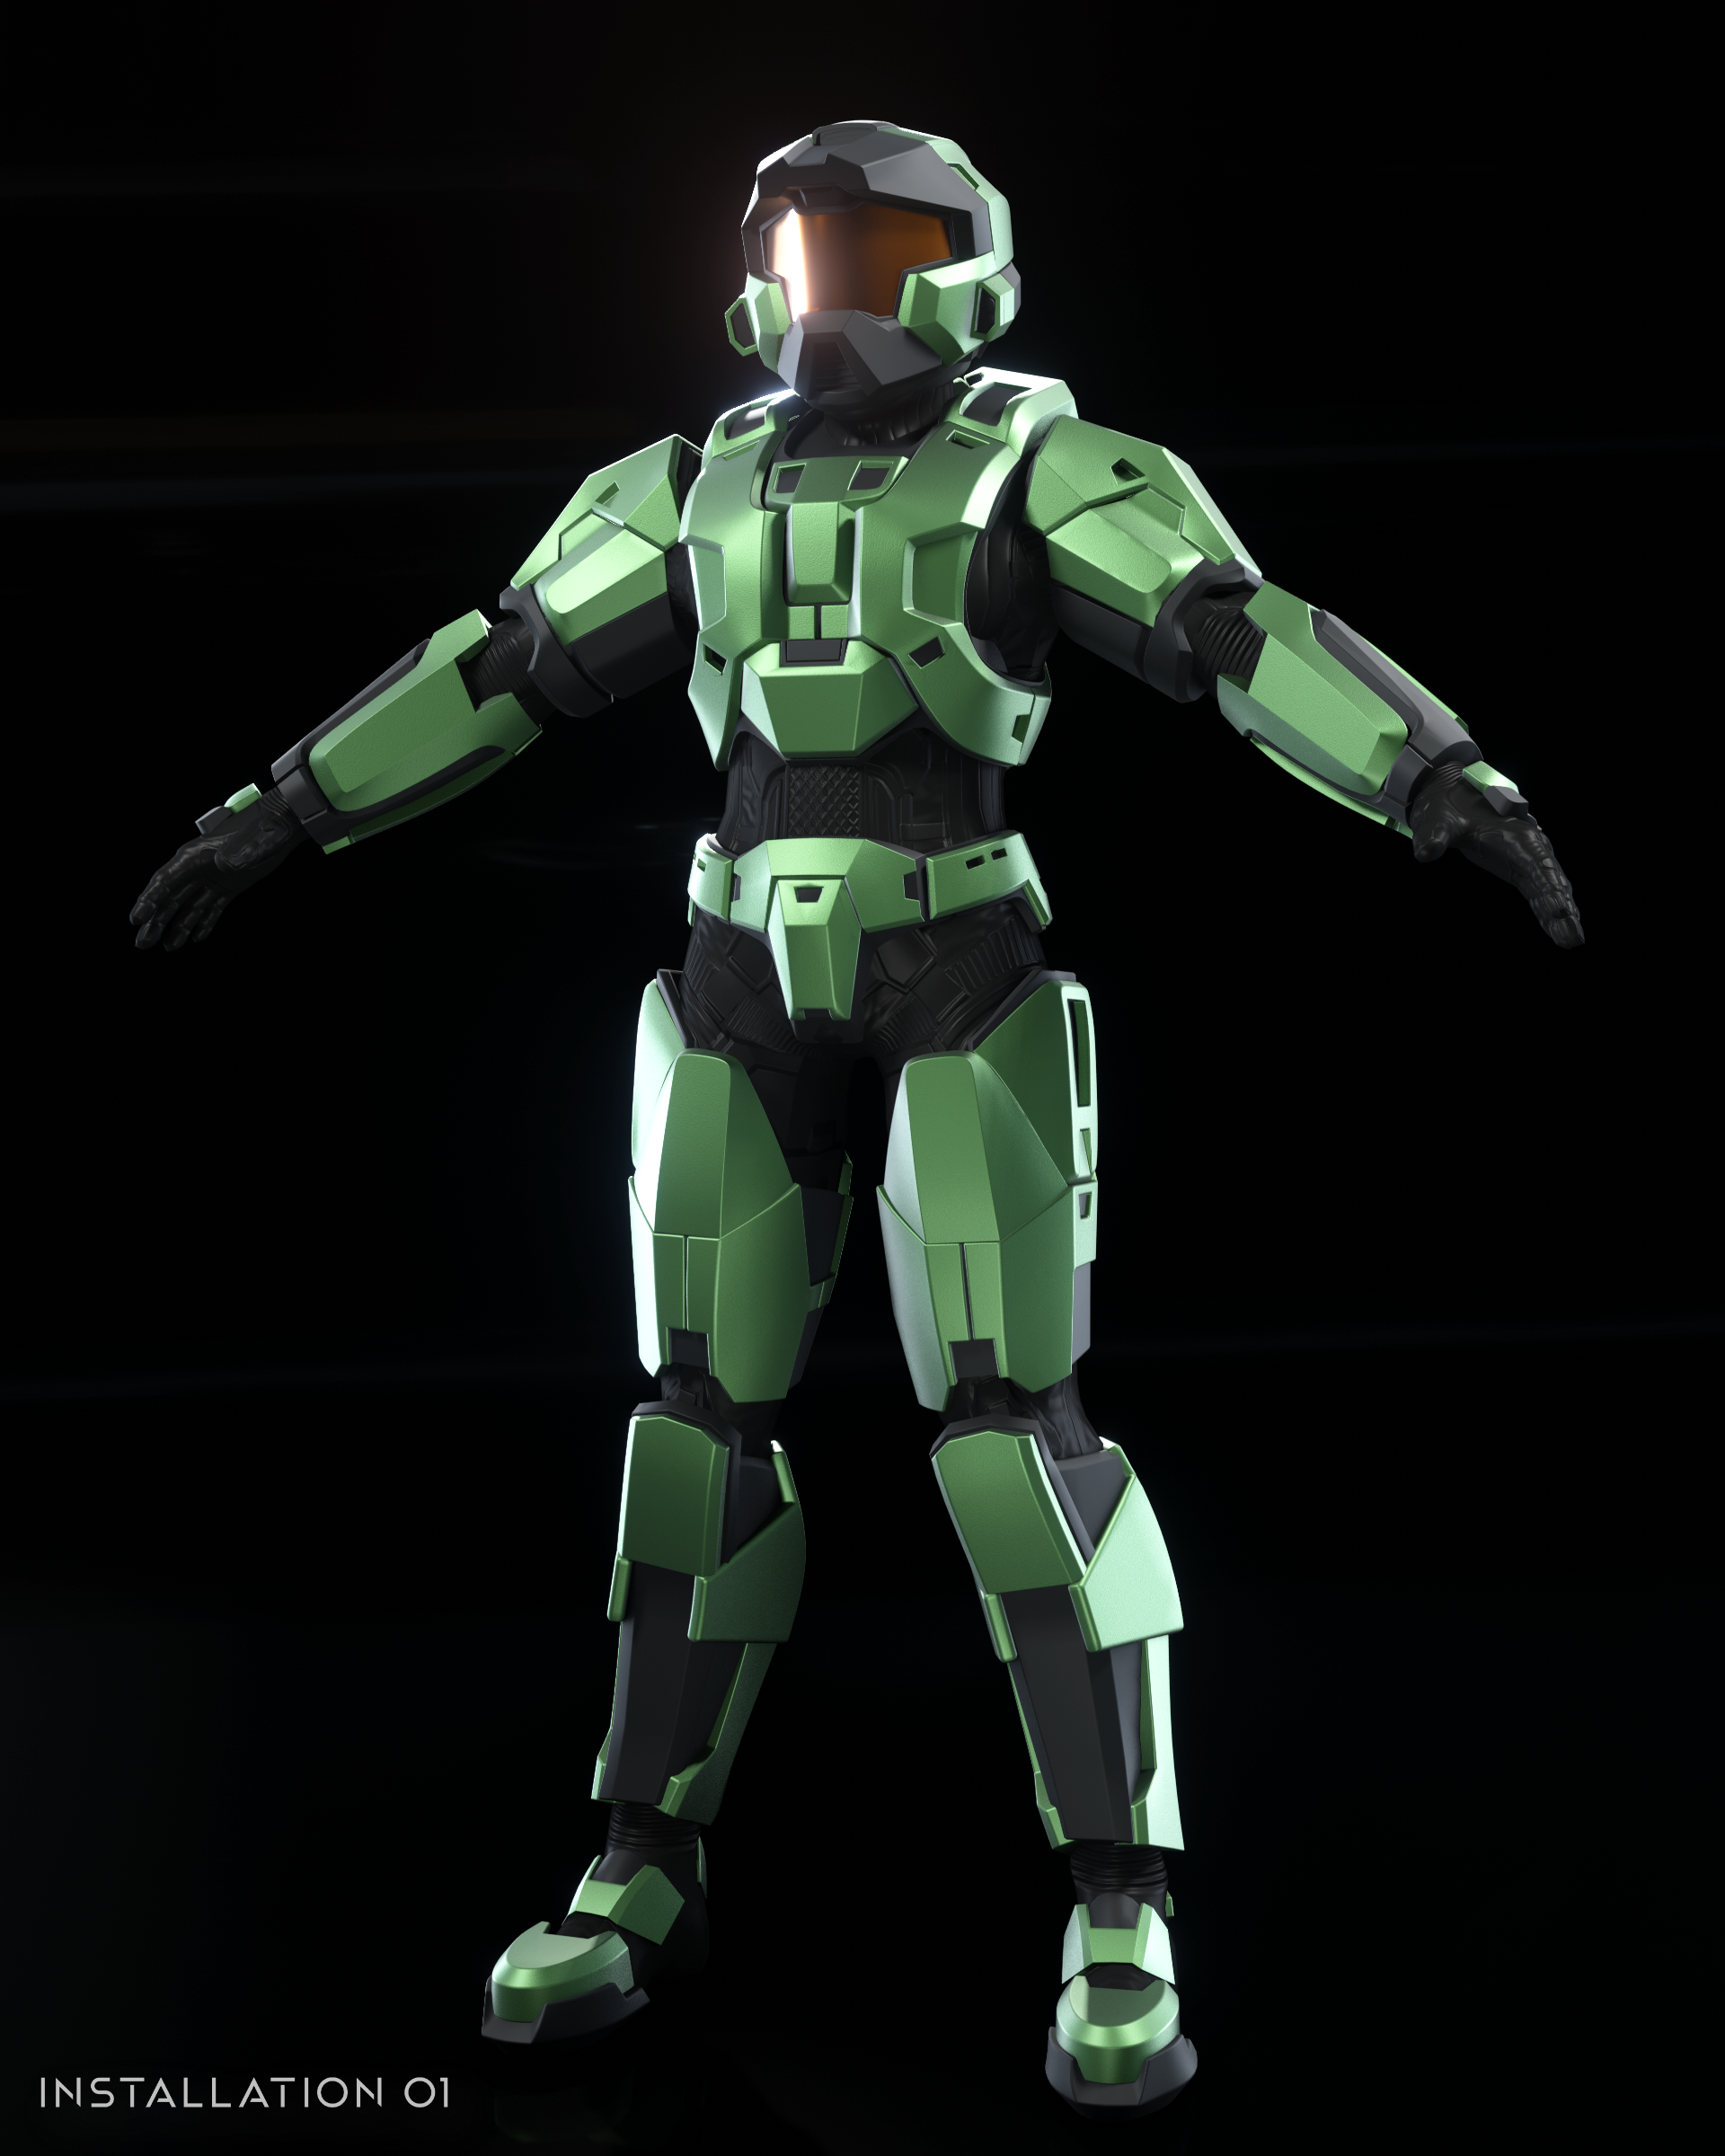
Hi, I'm Clemen. I'm a 3D artist from Singapore that joined the Installation 01 team in 2021. While I have experience in modeling weapons and props, this was my first time making an armour set. I found it much more challenging as there are more curved forms to deal with and many ways that ugly pinching can show up on the model. I took my time and treated it as a learning experience and wound up spending over 3 months working on the Recruit.

I started by compiling the concept art provided by Samba to use as reference. One of the challenges of building a 3D model from 2D concept art is having to interpret and "solve" the concept in 3D. To make this easier, I started by sculpting a blockout model. Blockout models are not pretty to look at but are good enough to get an idea of how the final model will look. In this stage I do not have to worry about my topology at all and could focus on replicating the concept in 3D. It's also not very time consuming to make any quick changes based on feedback I receive. I need to thank Samba for providing me several paintovers for when I was having trouble figuring out the helmet's proportions.
Once I got the final approval for the blockout, I could get started on making the final high poly model, using the blockout model as a base.
I took some tips from a YouTube tutorial by Rachel Frick
and focused on modeling the largest forms and not worrying too much about any clipping or gaps between them.
These can be ignored at the start, and will later be filled out with padding or small adjustments when everything else is in place.
While I worked on it, I provided regular updates to seek feedback from the art team.
As mentioned earlier, I was taking my time with the model and treating it as a learning experience.
I even ended up redoing parts of the helmet, chest and lower leg a couple times.

The extra padding on the helmet is an optional attachment for the helmet, you will be able to toggle them on and off.
Same with the kitty ears, which was a joke suggestion that I ended up taking all the way to the end. Just pretend that they're extra sensor equipment or something!
To those who want to see FOTUS, you will be relieved as Pat fought very hard to have that available for all, even if that meant the compromise had us include cat ears.

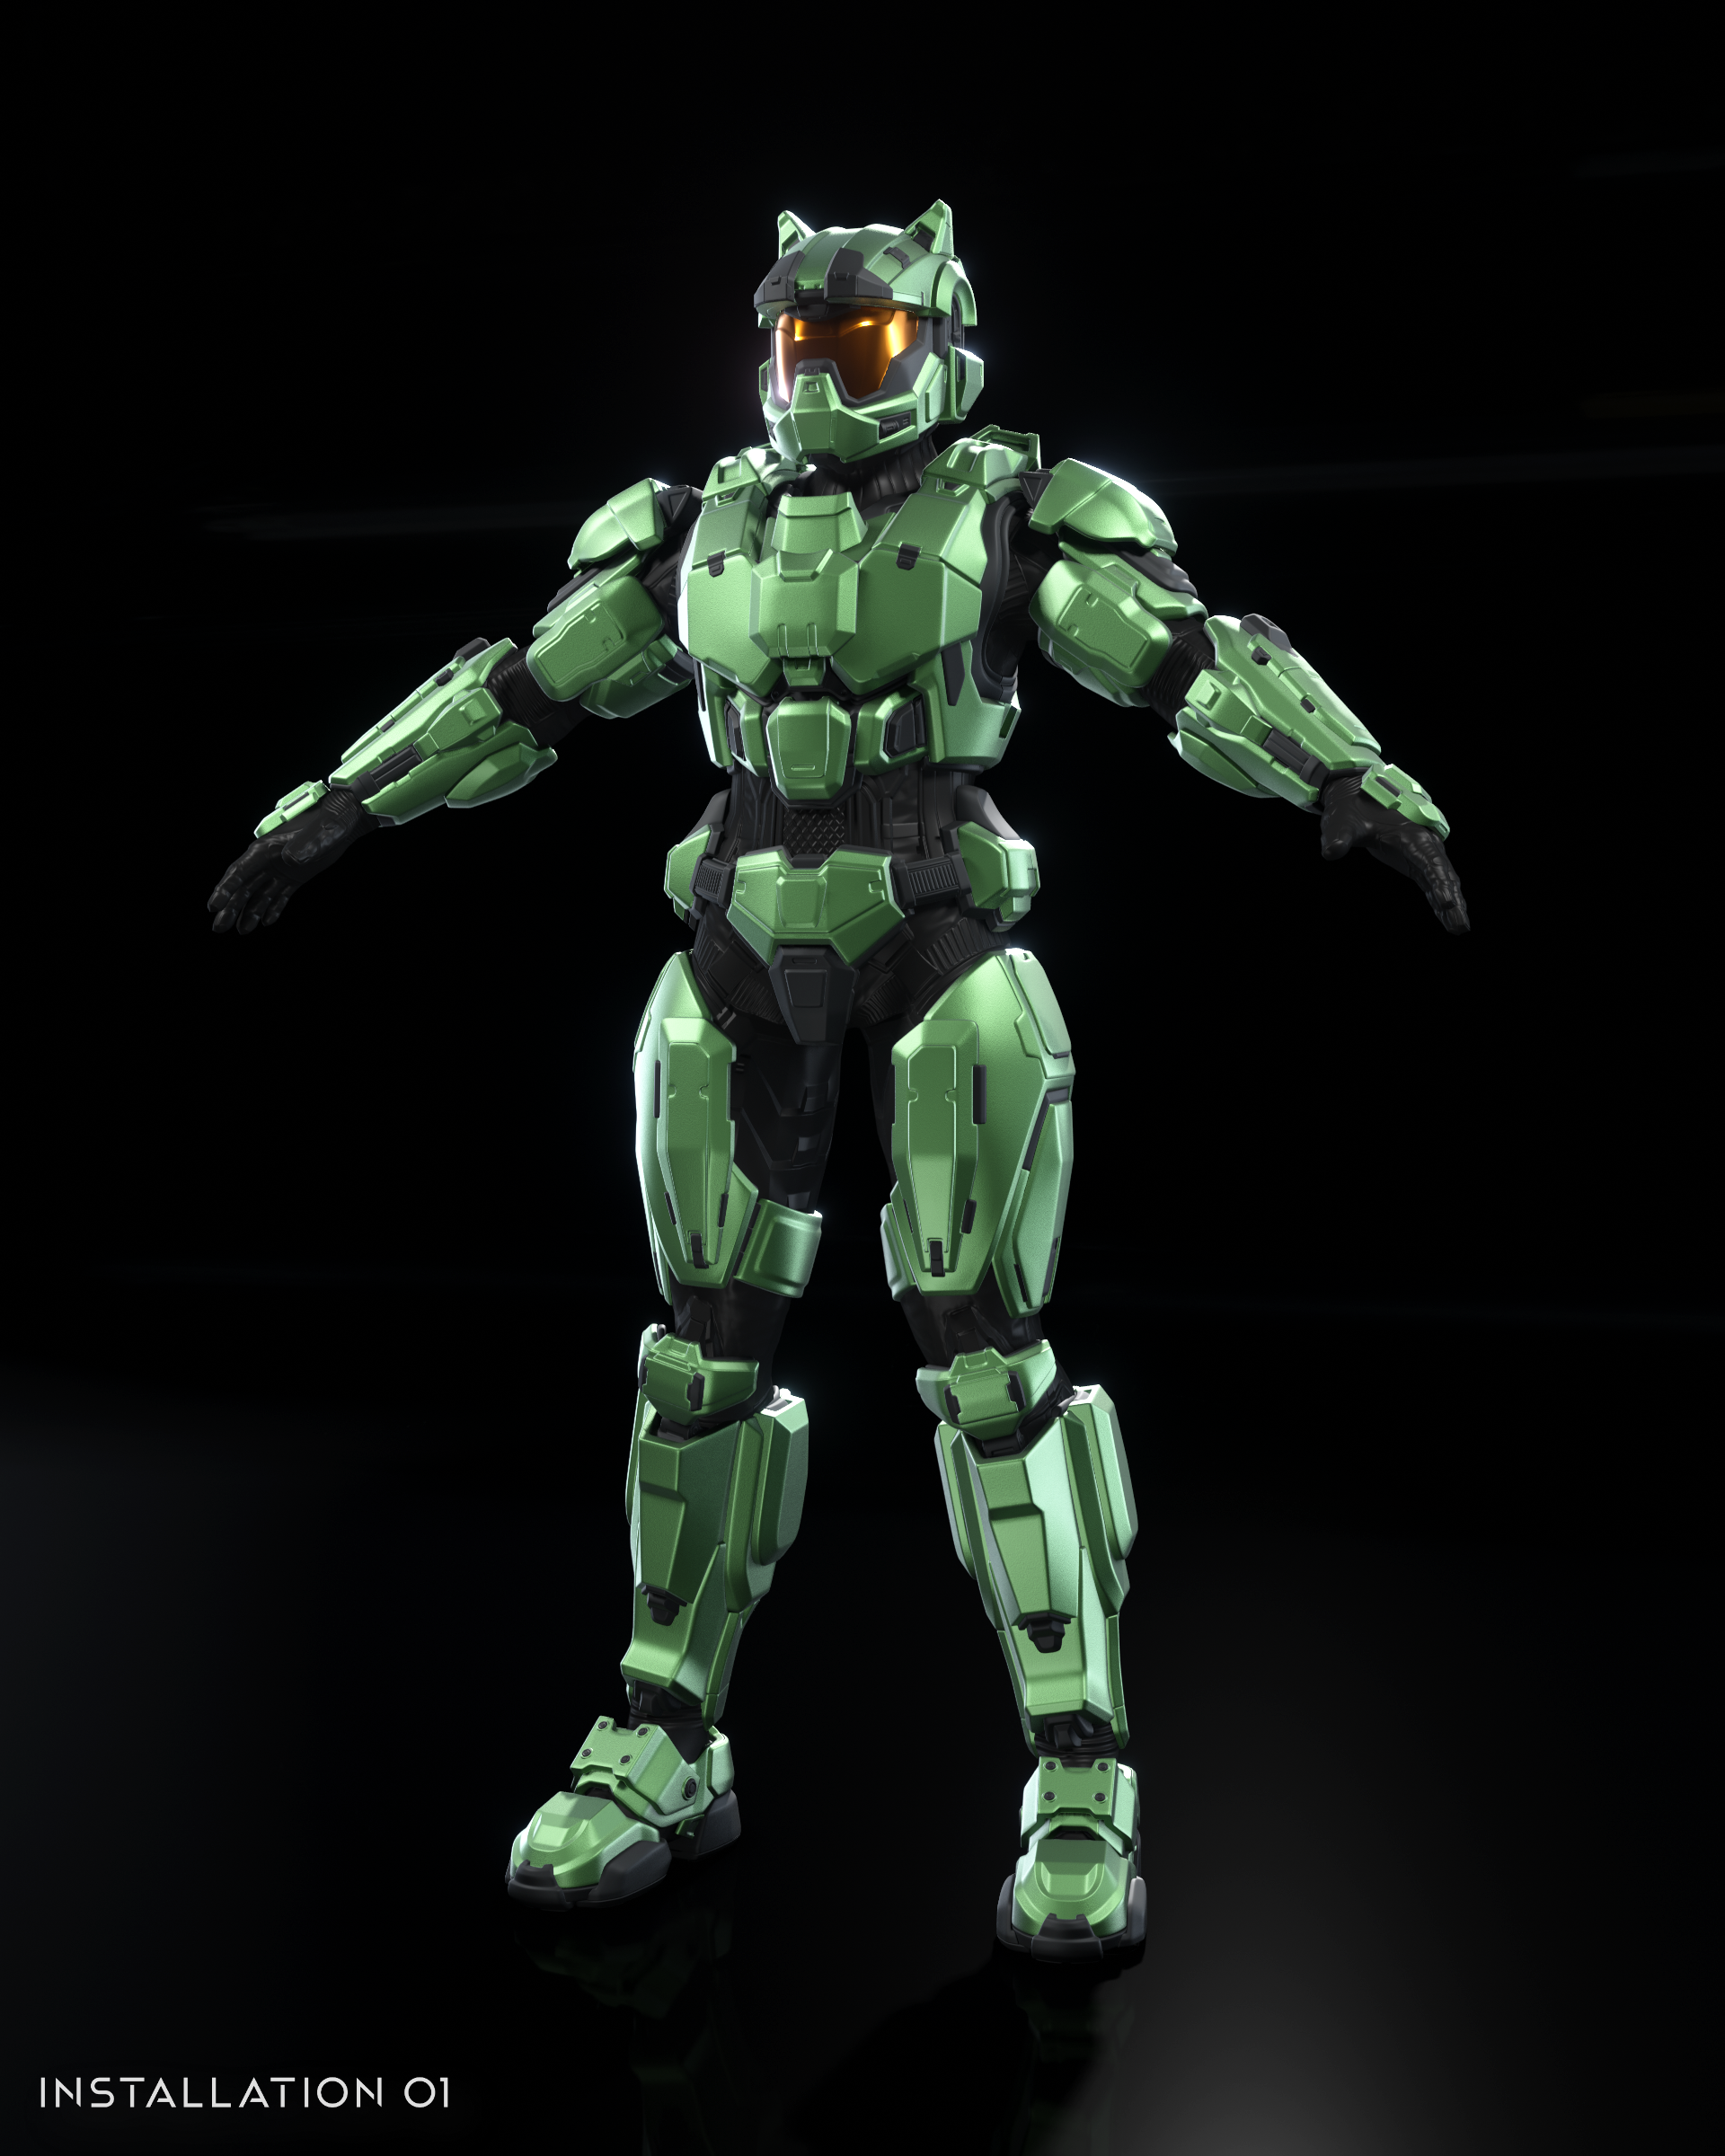
See what I mean? With this armour, you’ll have every eye looking your way on the battlefield. Friendly or foe alike, they won’t be able to peel their gaze from your Titanium-alloy-plated body. Now, if you think having so much attention in a firefight could be a bad thing, don’t worry, because we have you covered head-to-toe with the thickest and heaviest armour we could possibly shove onto a soldier in Clemen’s next set:
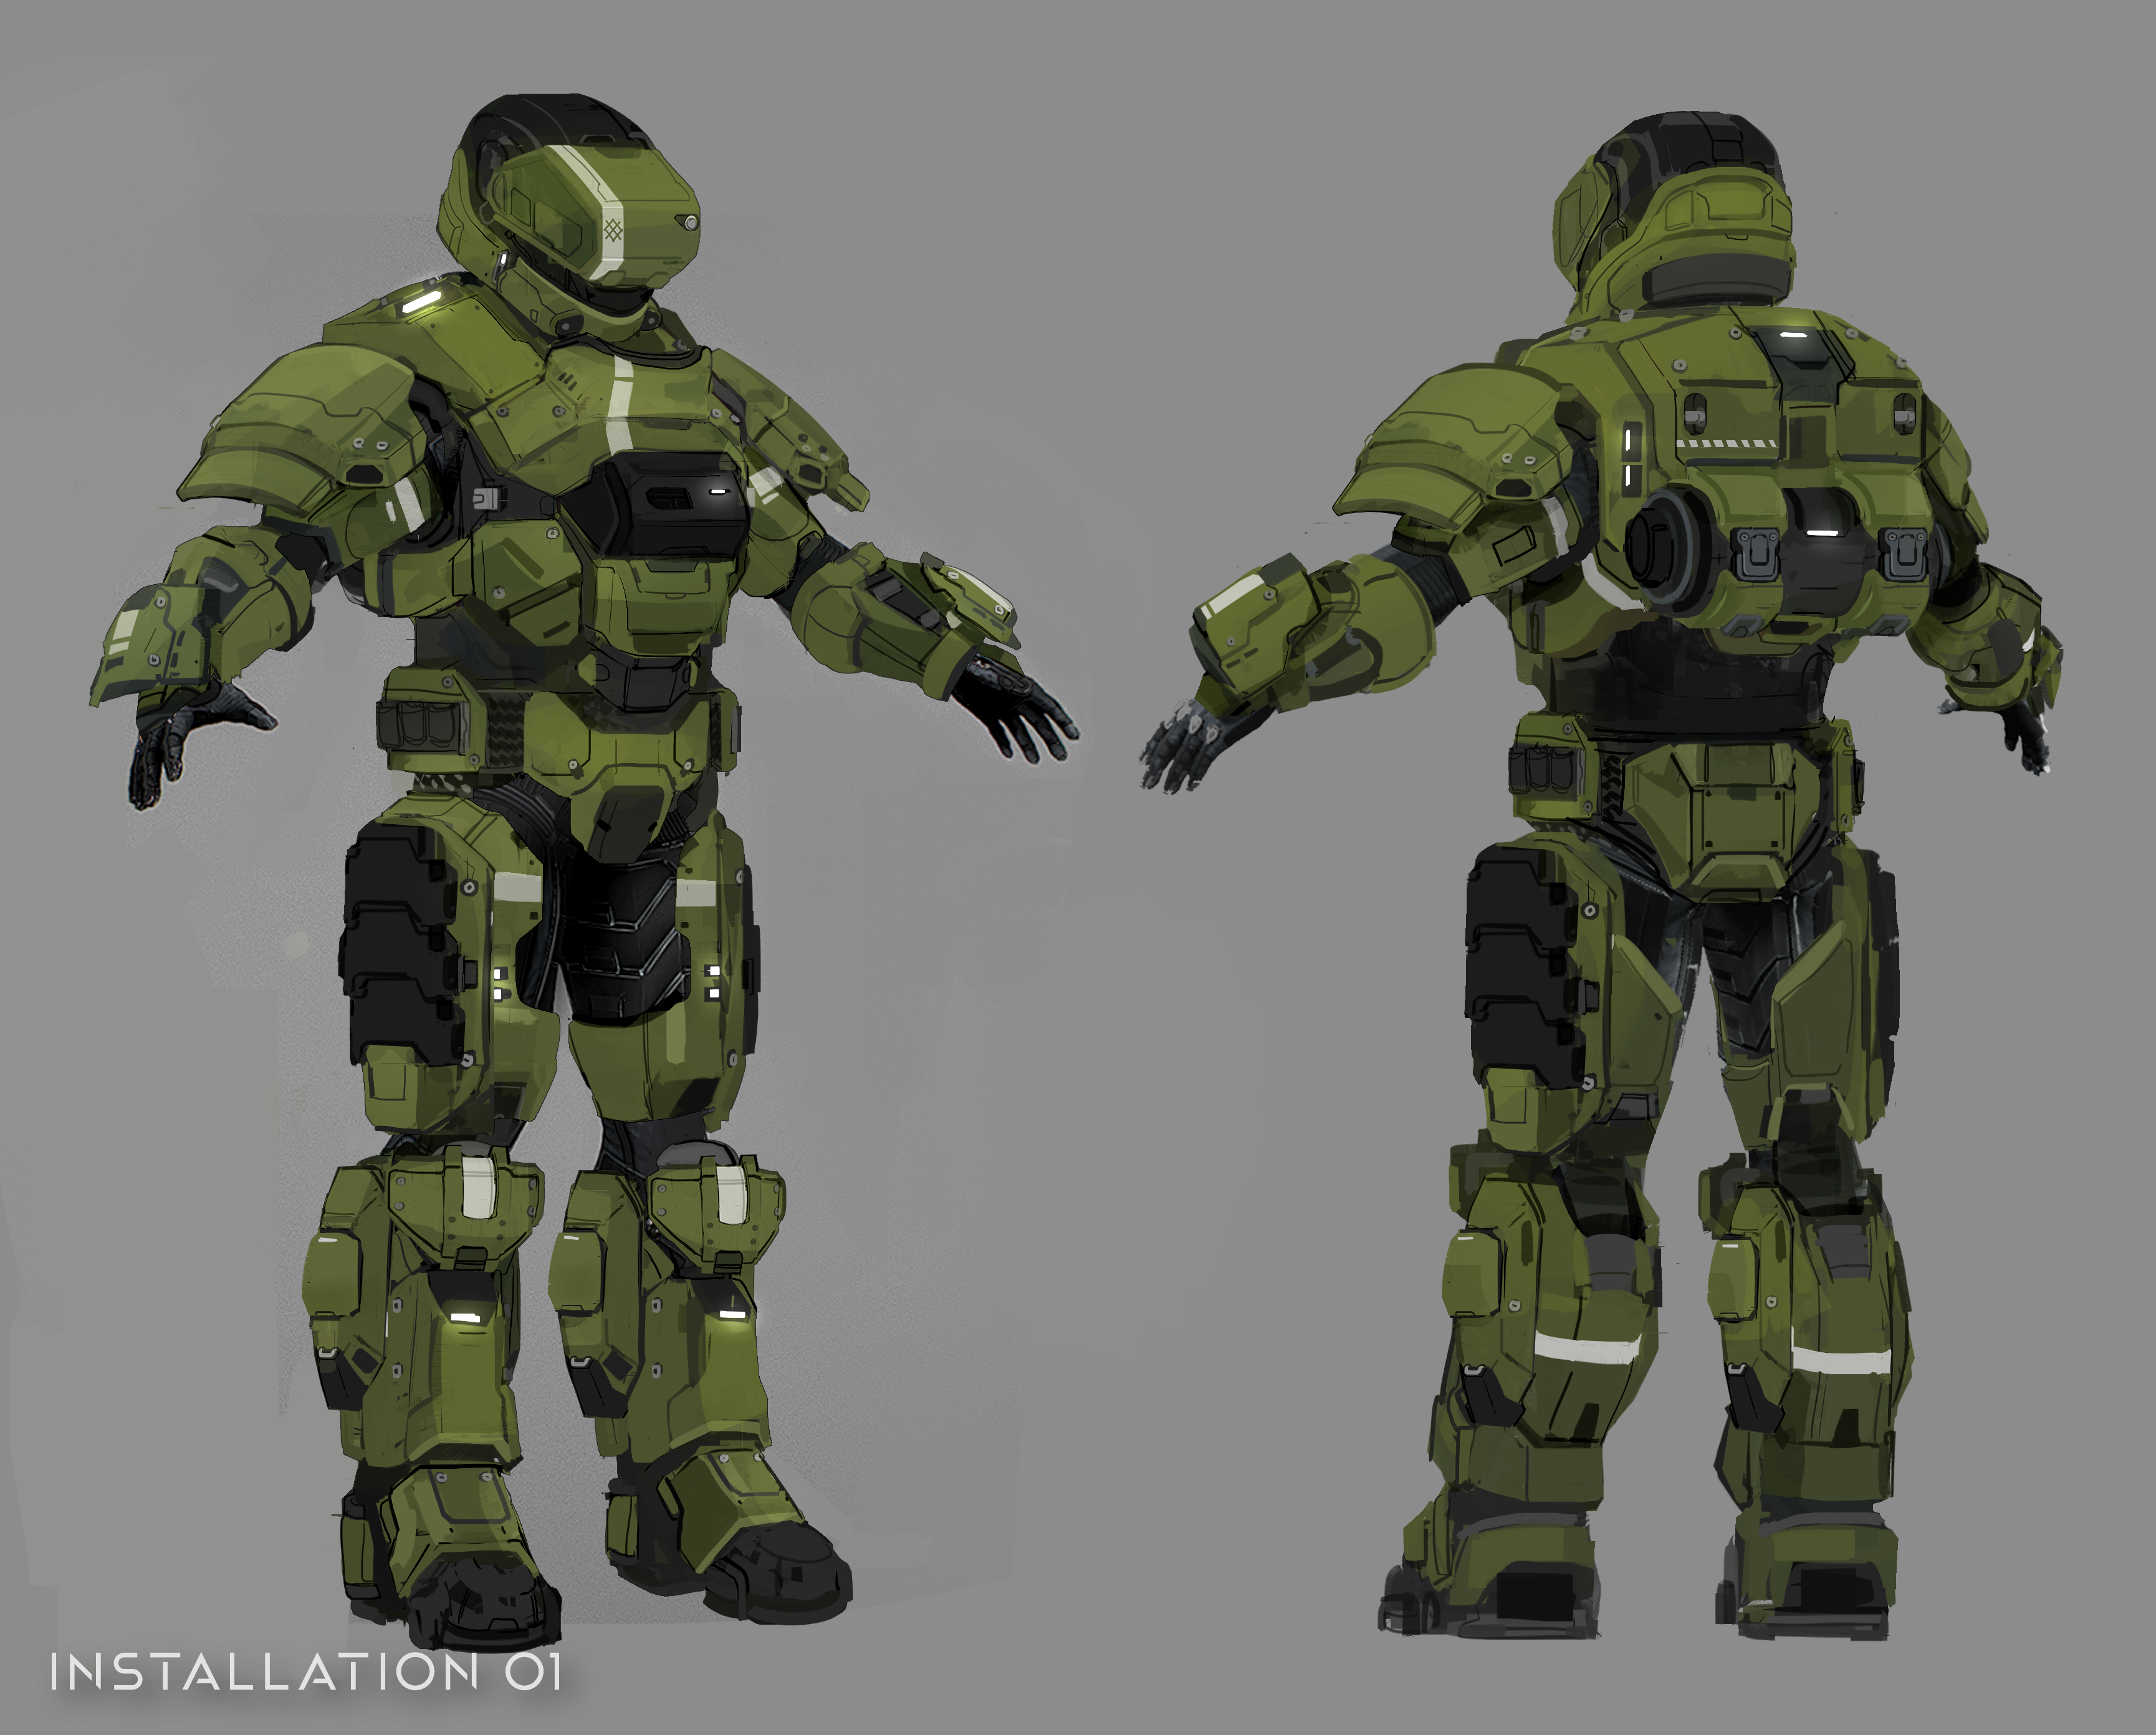
CHUNKY YET FUNKY
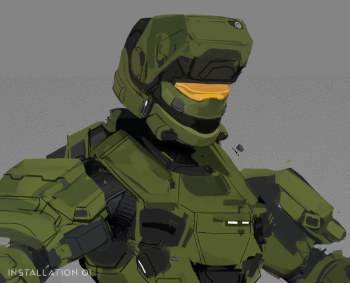
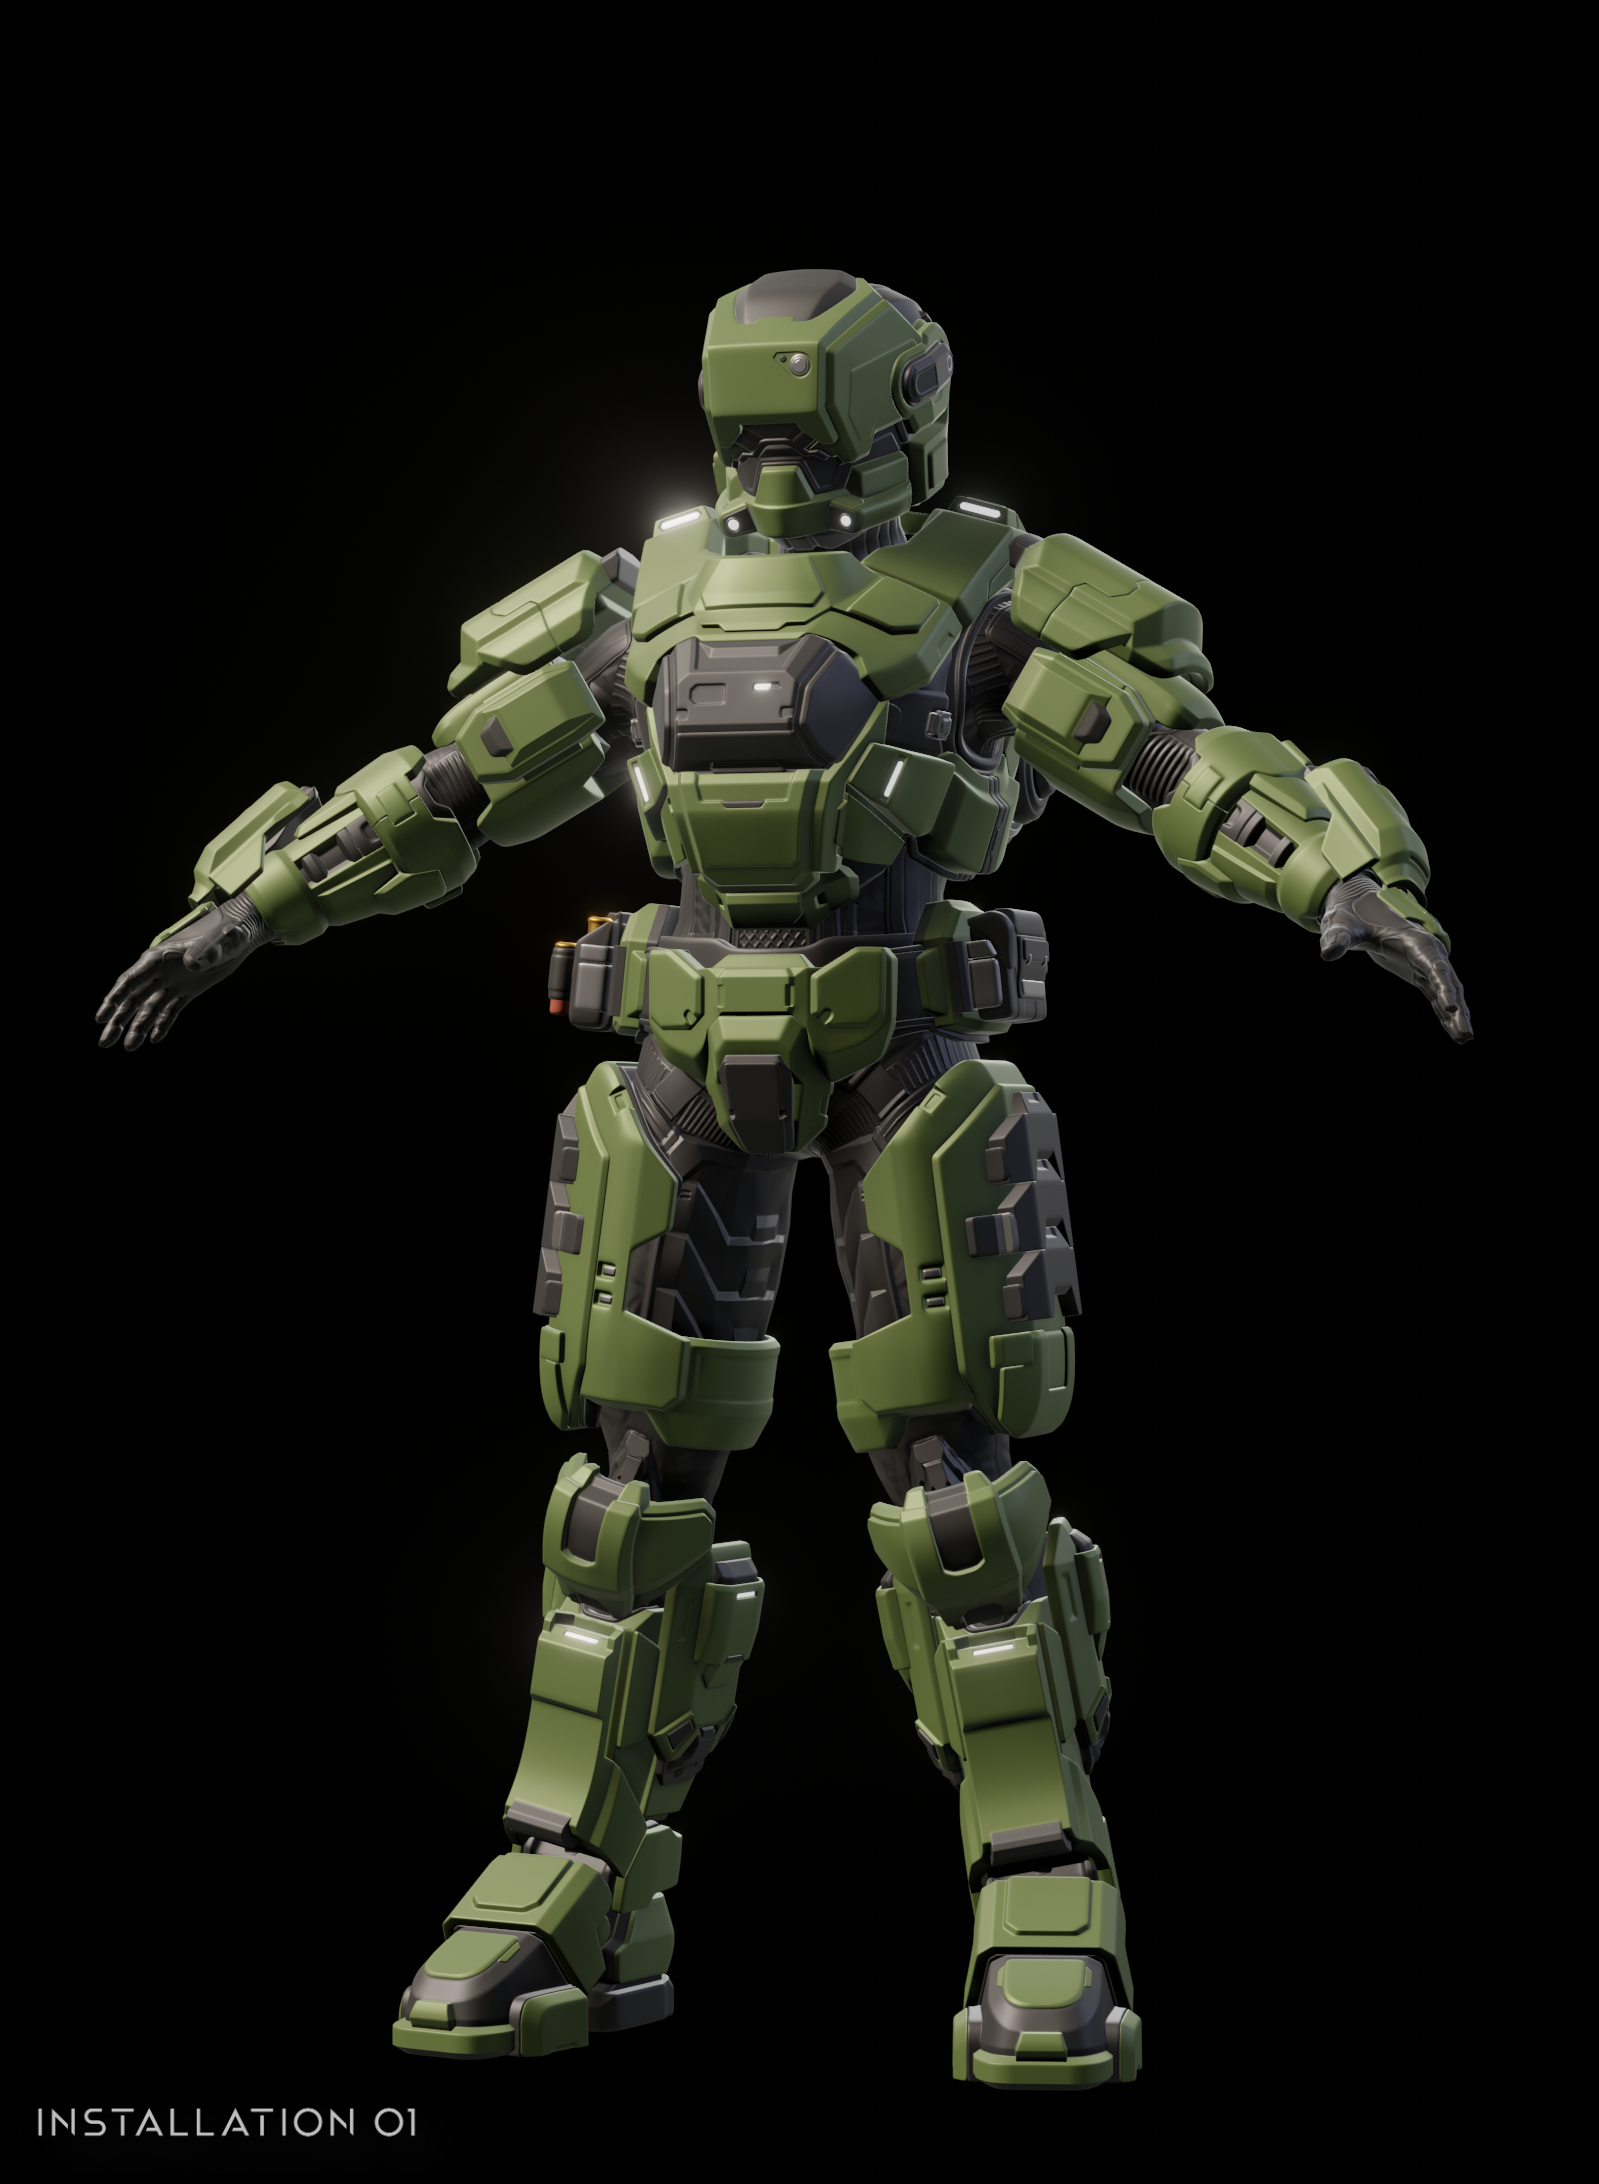
Right after finishing the recruit set, Clemen hopped right over to a set we’ve had on the backburner: Gungnir. I can really only talk about how majestically chunky it looks, so I’m once again bringing Clemen over to talk about making it and what was applied from the experience in making the recruit armour.
I was very excited to work on this armour set due to having worked with Naka before. Naka did a great job with the concept art for Gungnir. I just loved how chunky it looked as well as the visor design. (Fun fact! We chose an old Halo 3 helmet design from a cut piece of concept art, see if you can spot which one we used!)
I more or less did the same thing as the Recruit, although with some differences to make everything go faster.
Compared to a whole 3 months on the Recruit, I finished about 70% of the armour in a week and then did the rest over an additional 3 weeks
as I was busy with some real life stuff during this period.
I worked from big to small, focusing on the silhouette and larger forms as these are the most noticeable parts of the armour.
I think this helped a lot in speeding things up as I could focus on the larger forms and only started adding in small details like
panel lines, bolts, and lights when they were done.
I also made use of Blender instancing so I could work on an undisturbed upright model and see the changes I made in realtime on a posed model.
This came in handy for the arm, leg, and visor, as they are posed at angles which are harder to work with in the final model.
In hindsight, I would have saved a lot of time if I had also done this for the Recruit set.
Additionally, less time was spent on redos and I was overall more confident when I had to make decisions regarding the detailing of the armour.
Overall, I'm quite happy with how this turned out. I can't wait to see what it looks like when it’s running around in a game with Maik's textures!
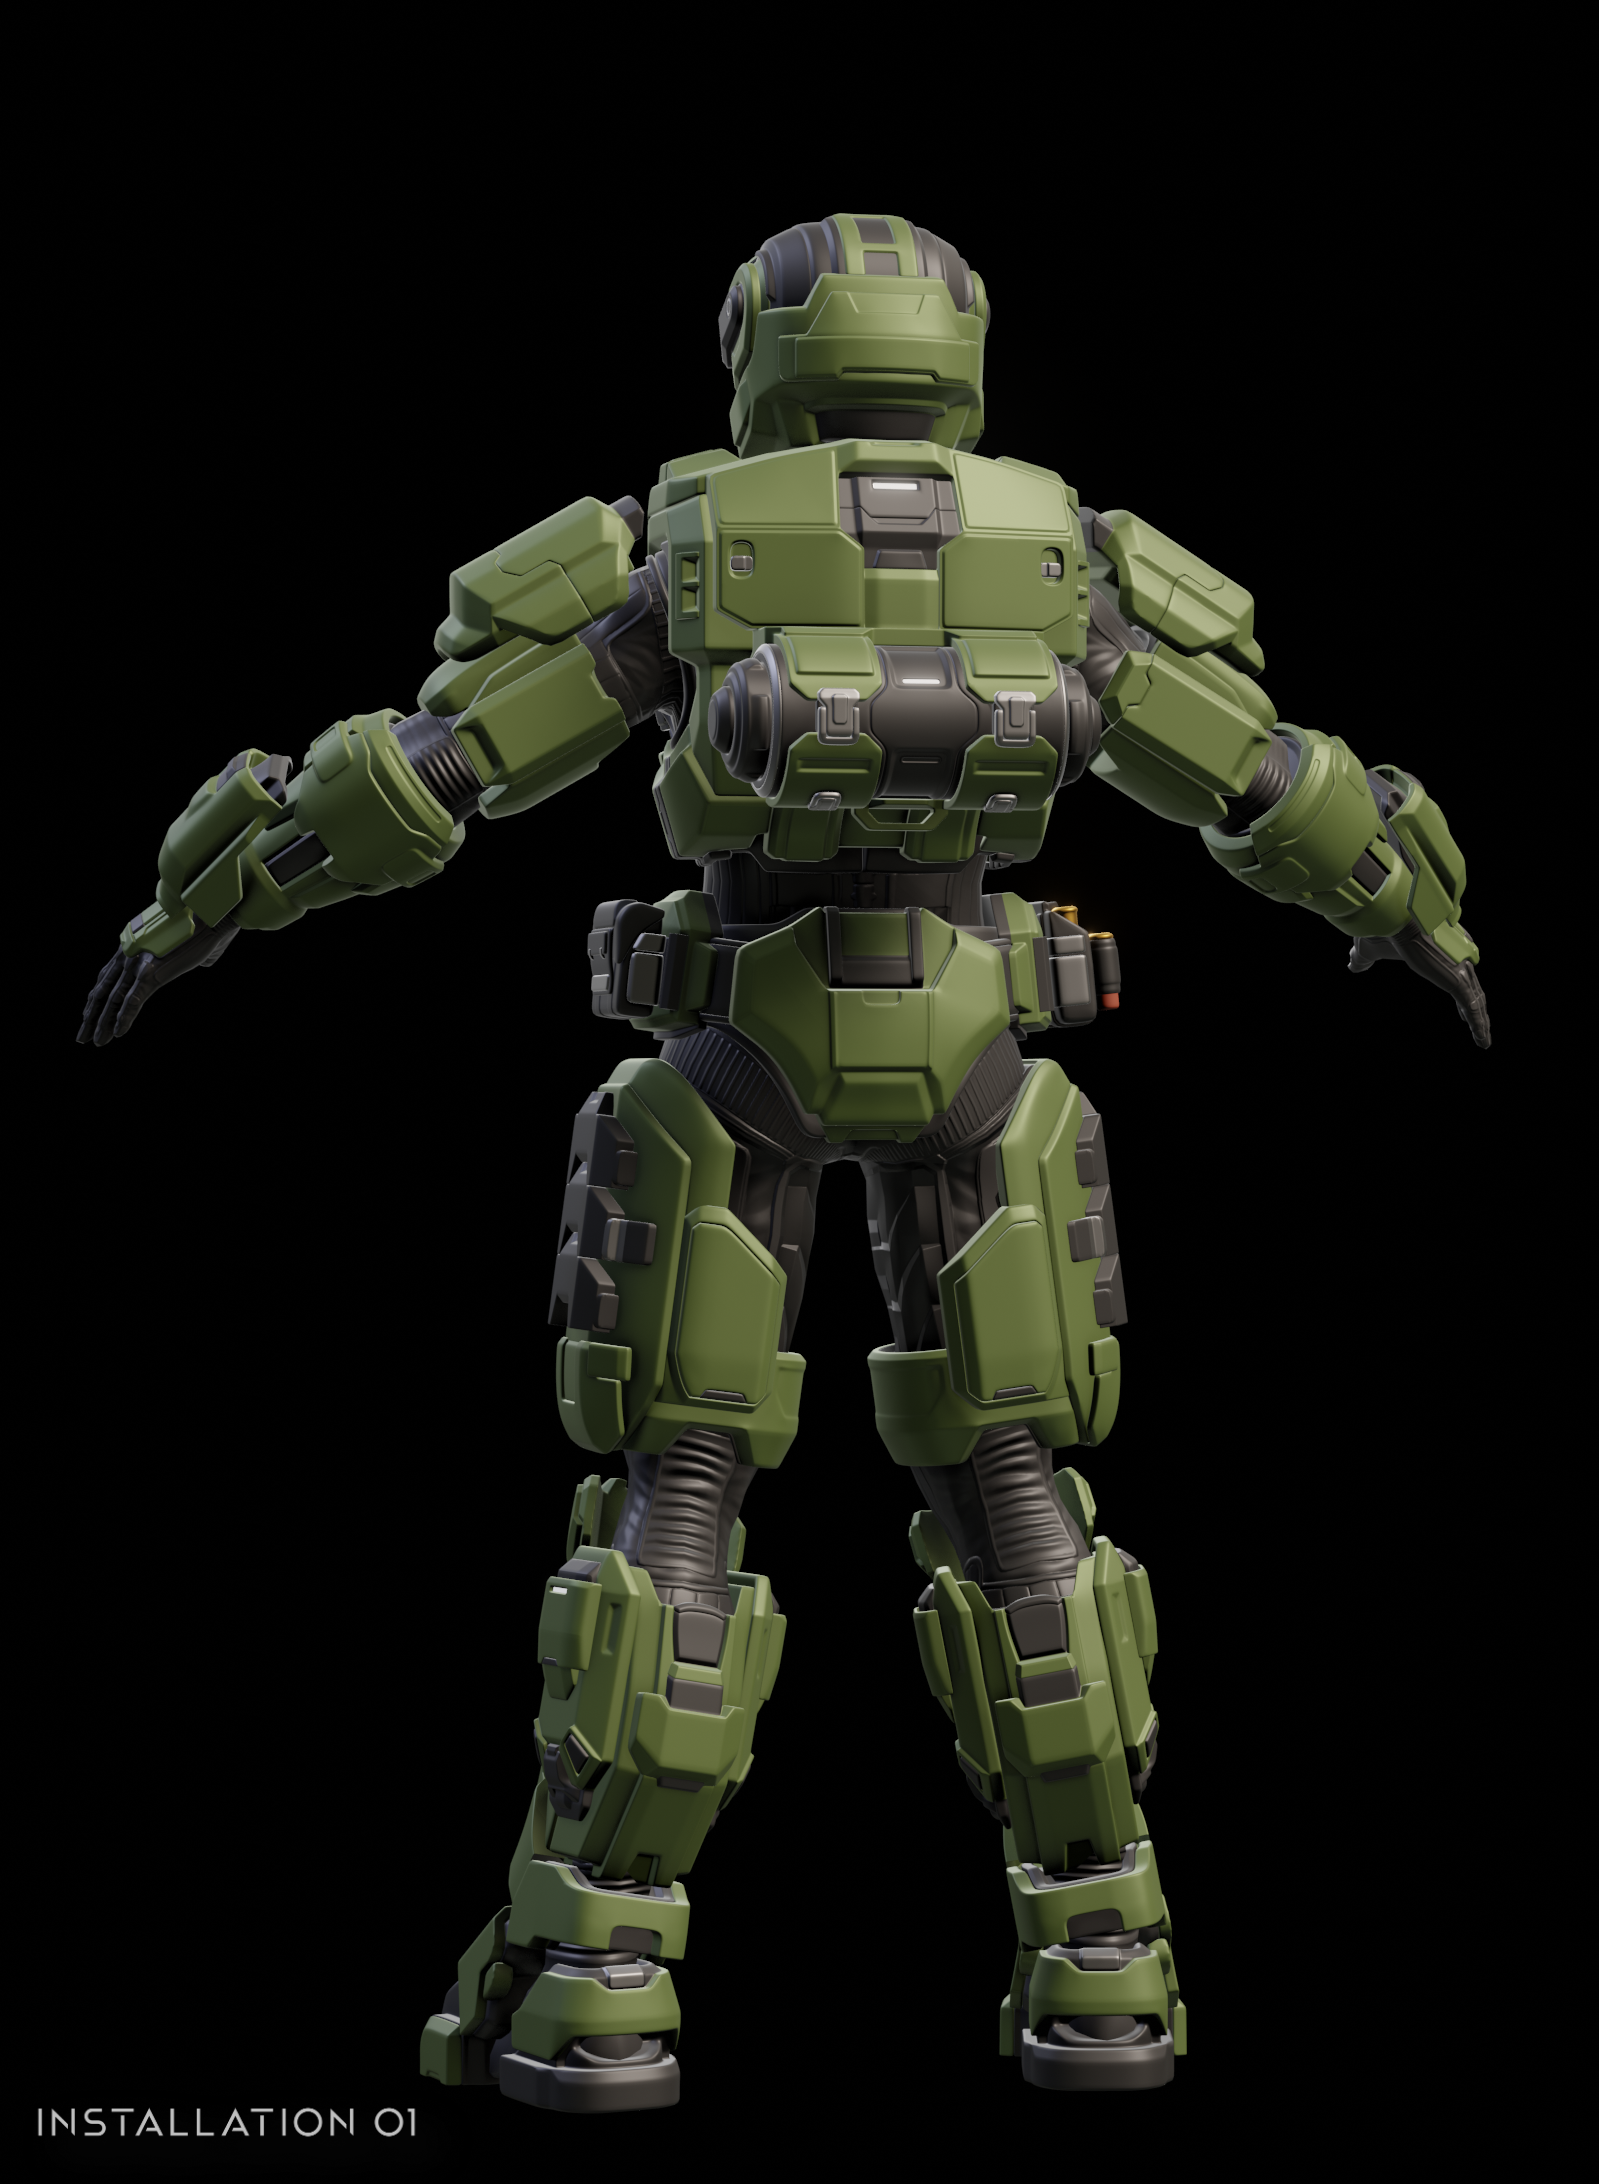
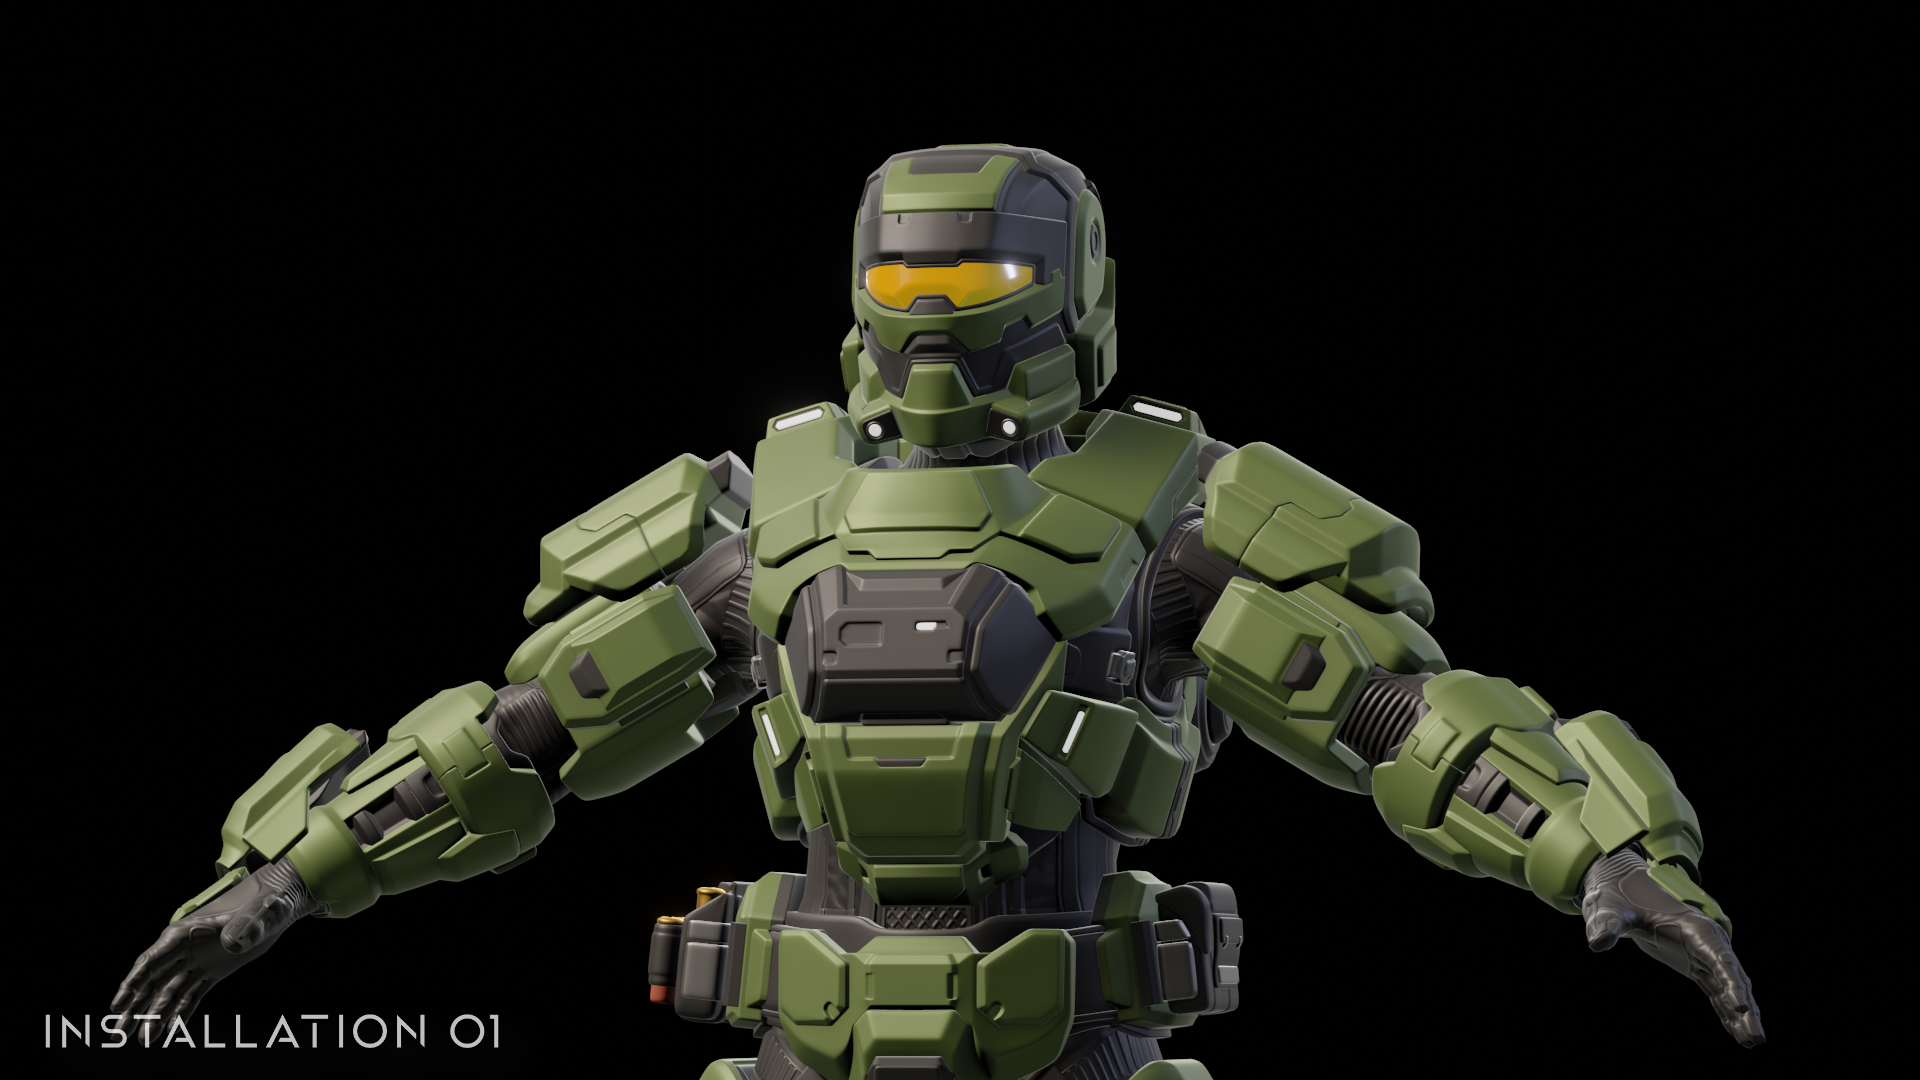
I can’t wait either. I can already tell that this is going to be one of my absolute favourites. Just look at how thicc he is! He’s so chunky! Thank you, Clemen, for giving us this thicc boi and for taking the time to talk about these armour sets.
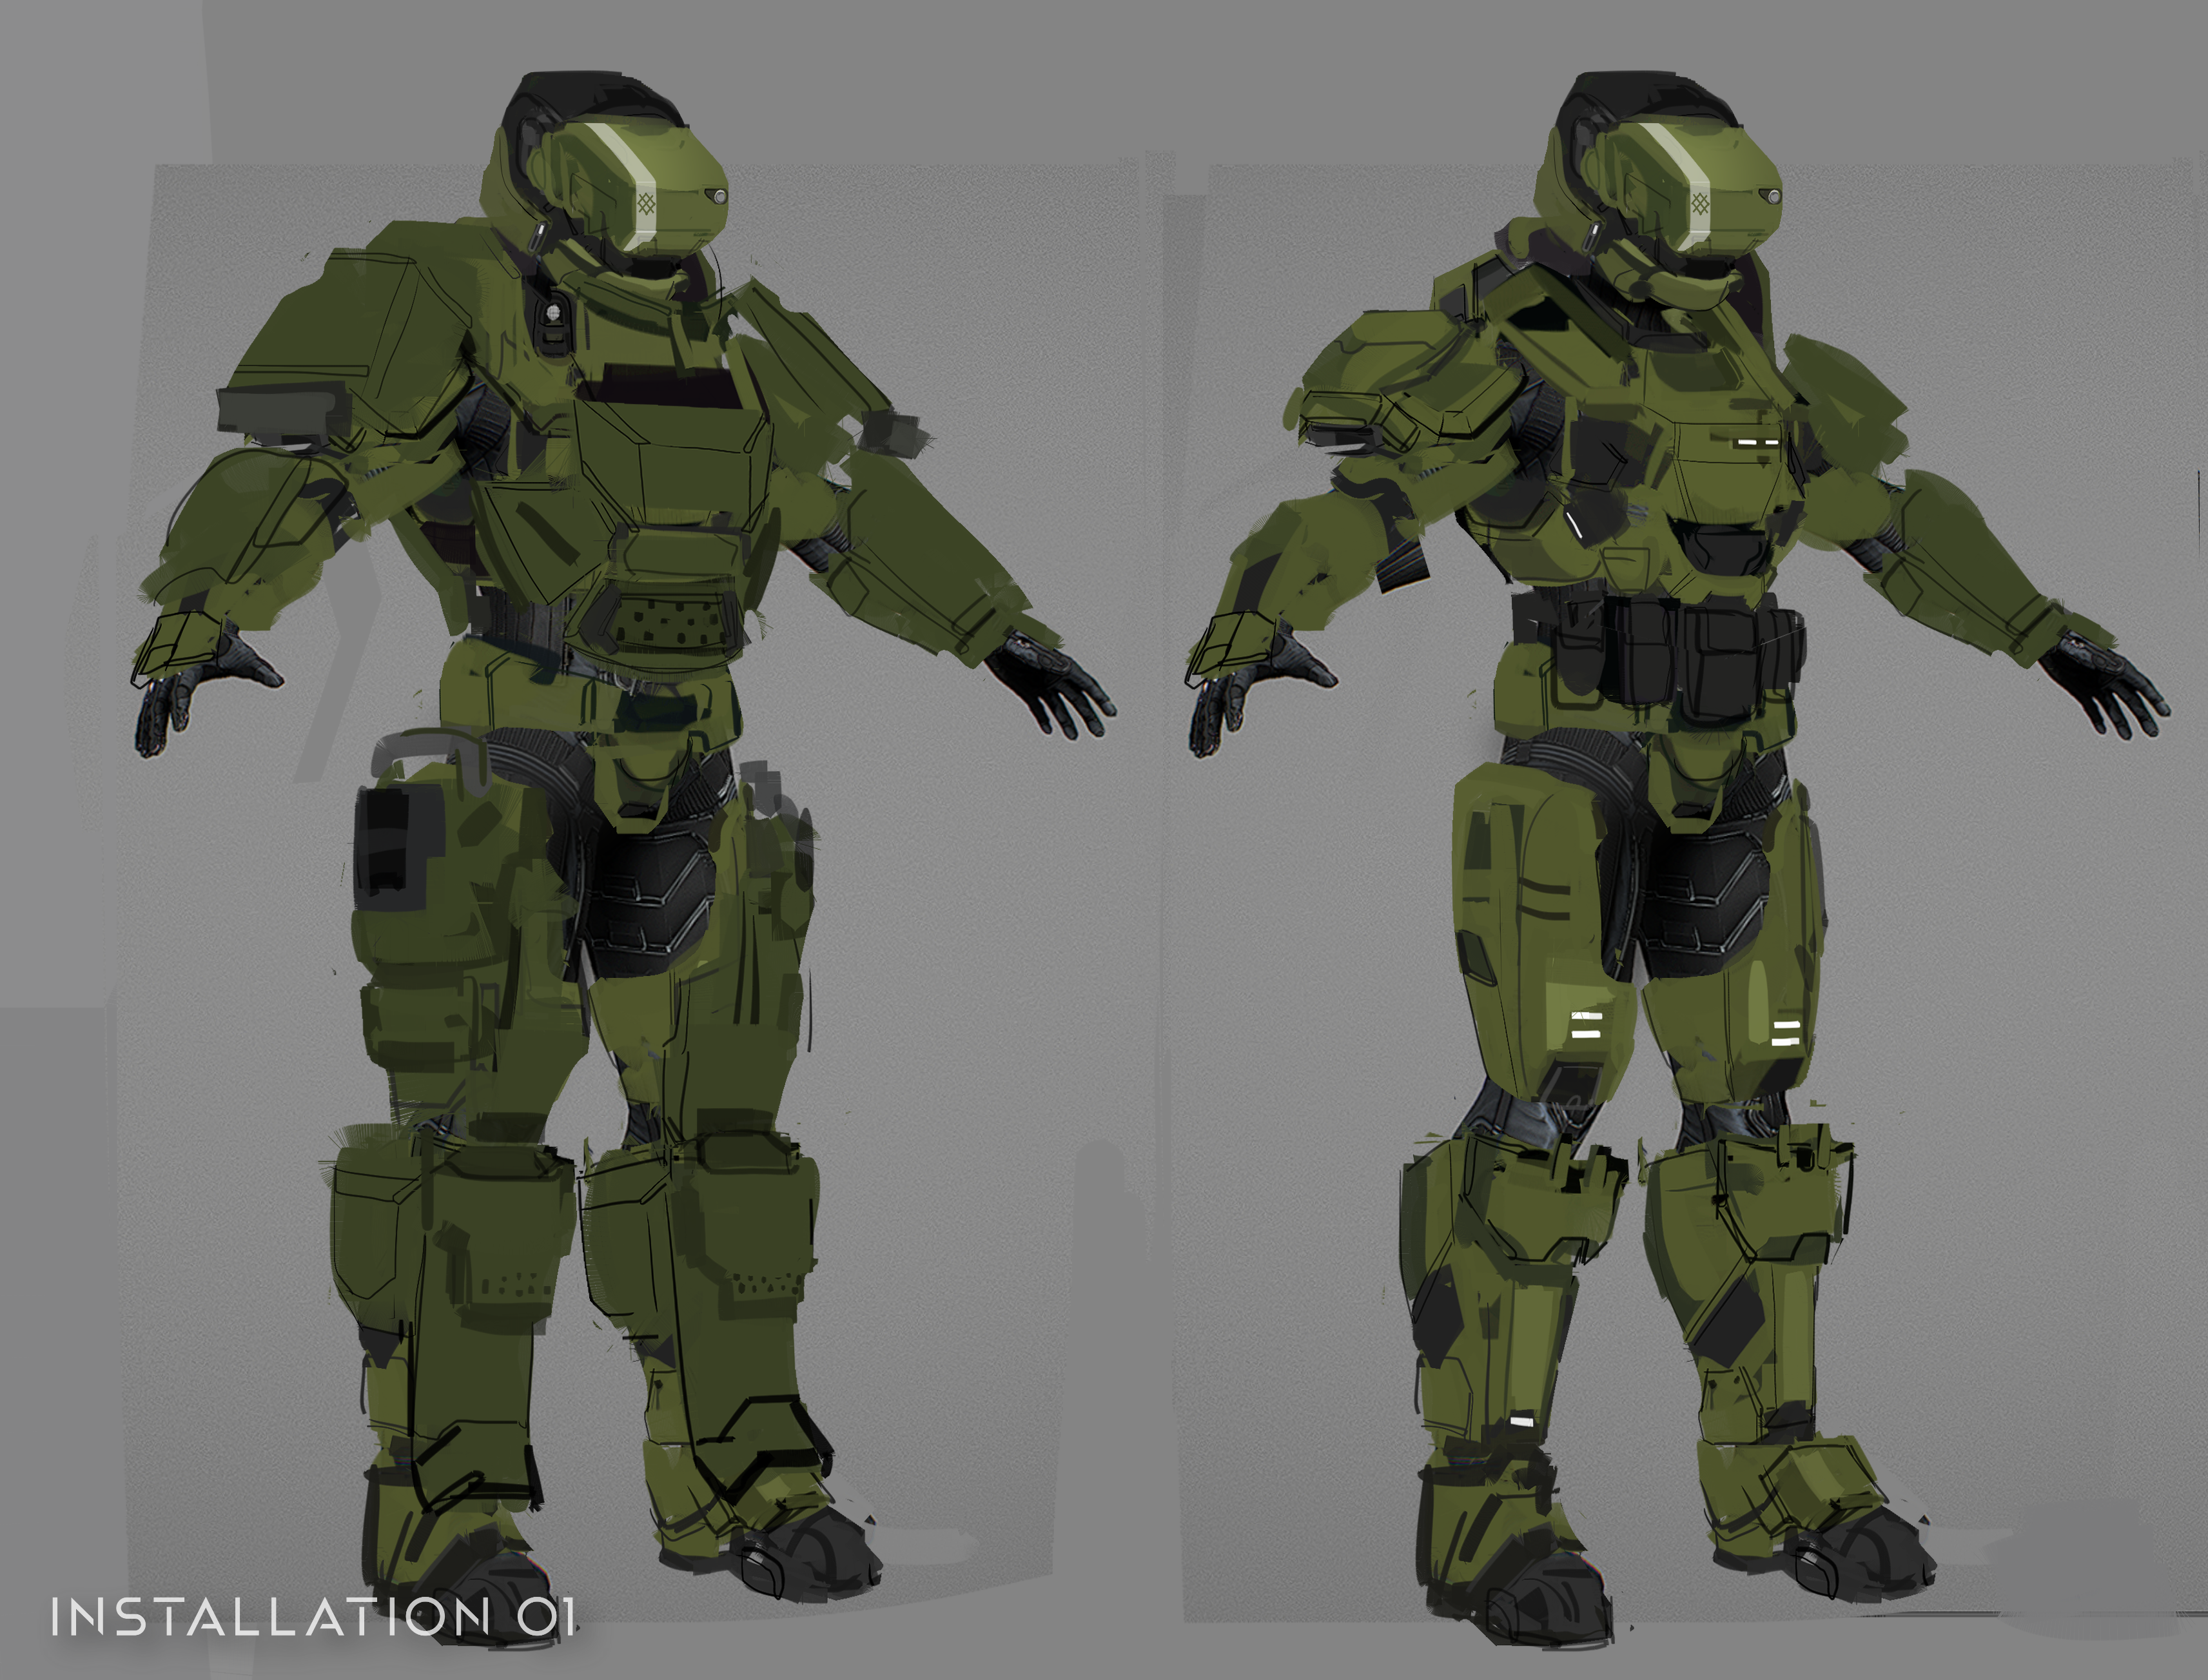
BRACE FOR IMPACT
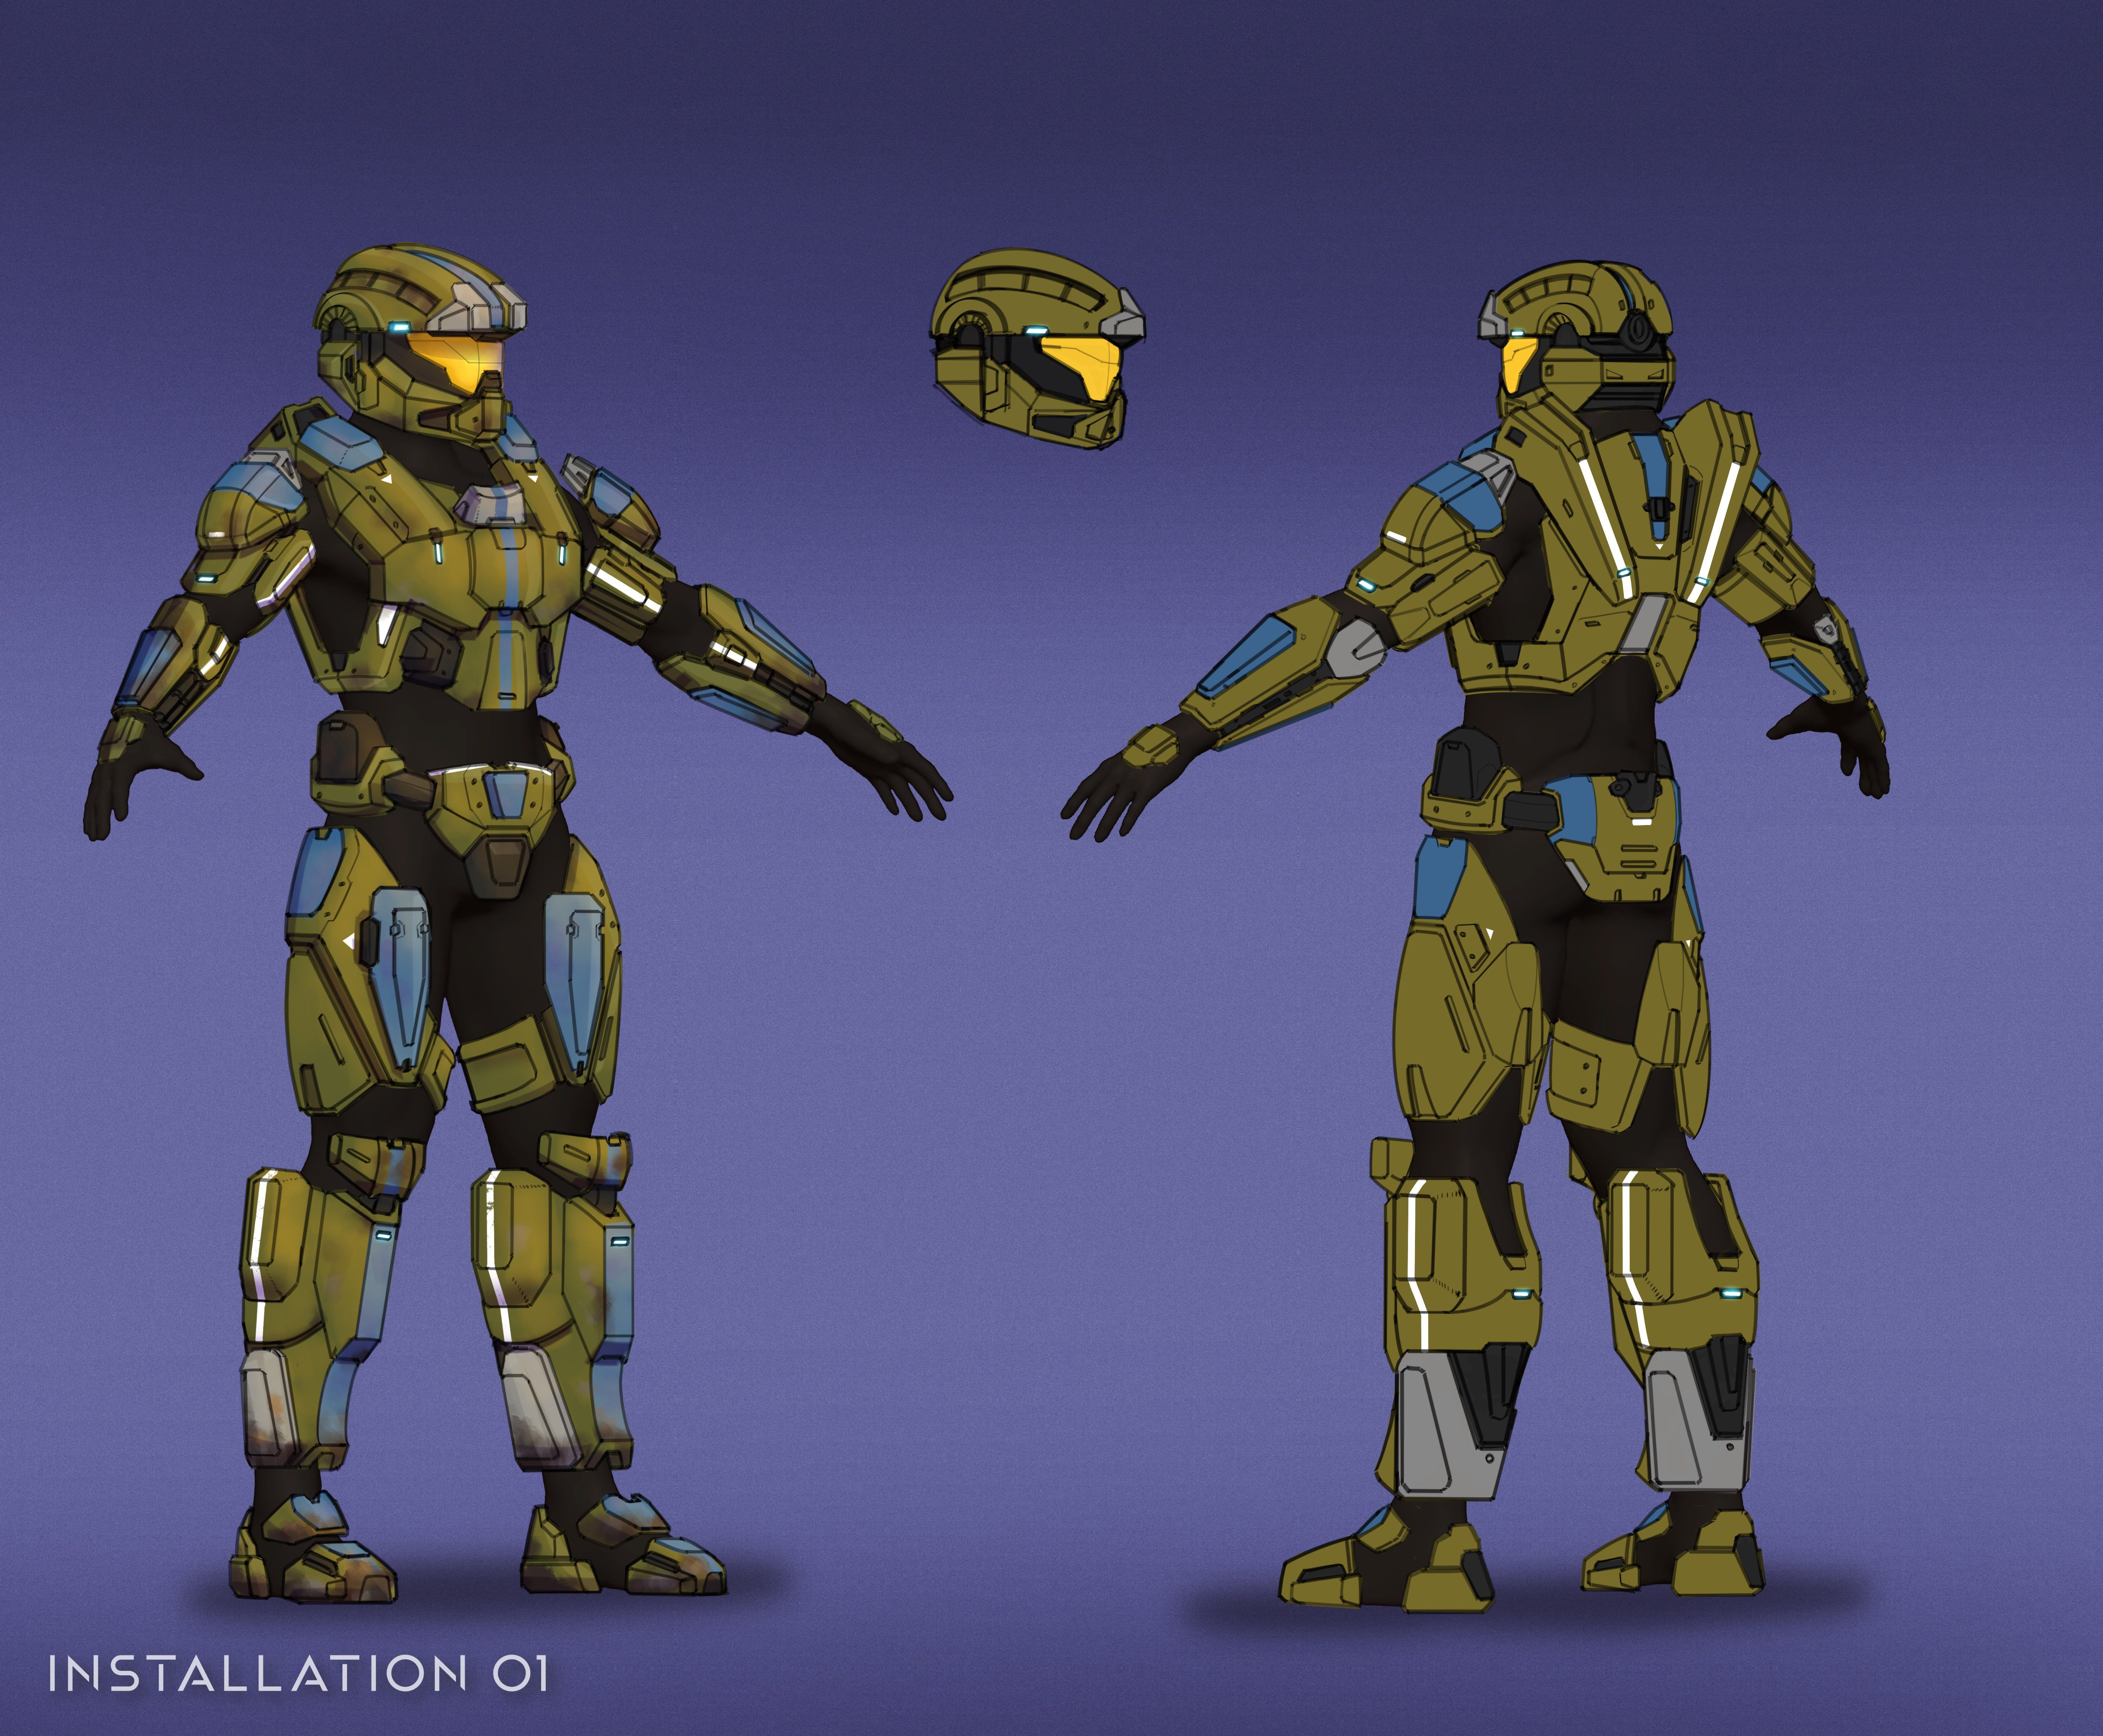
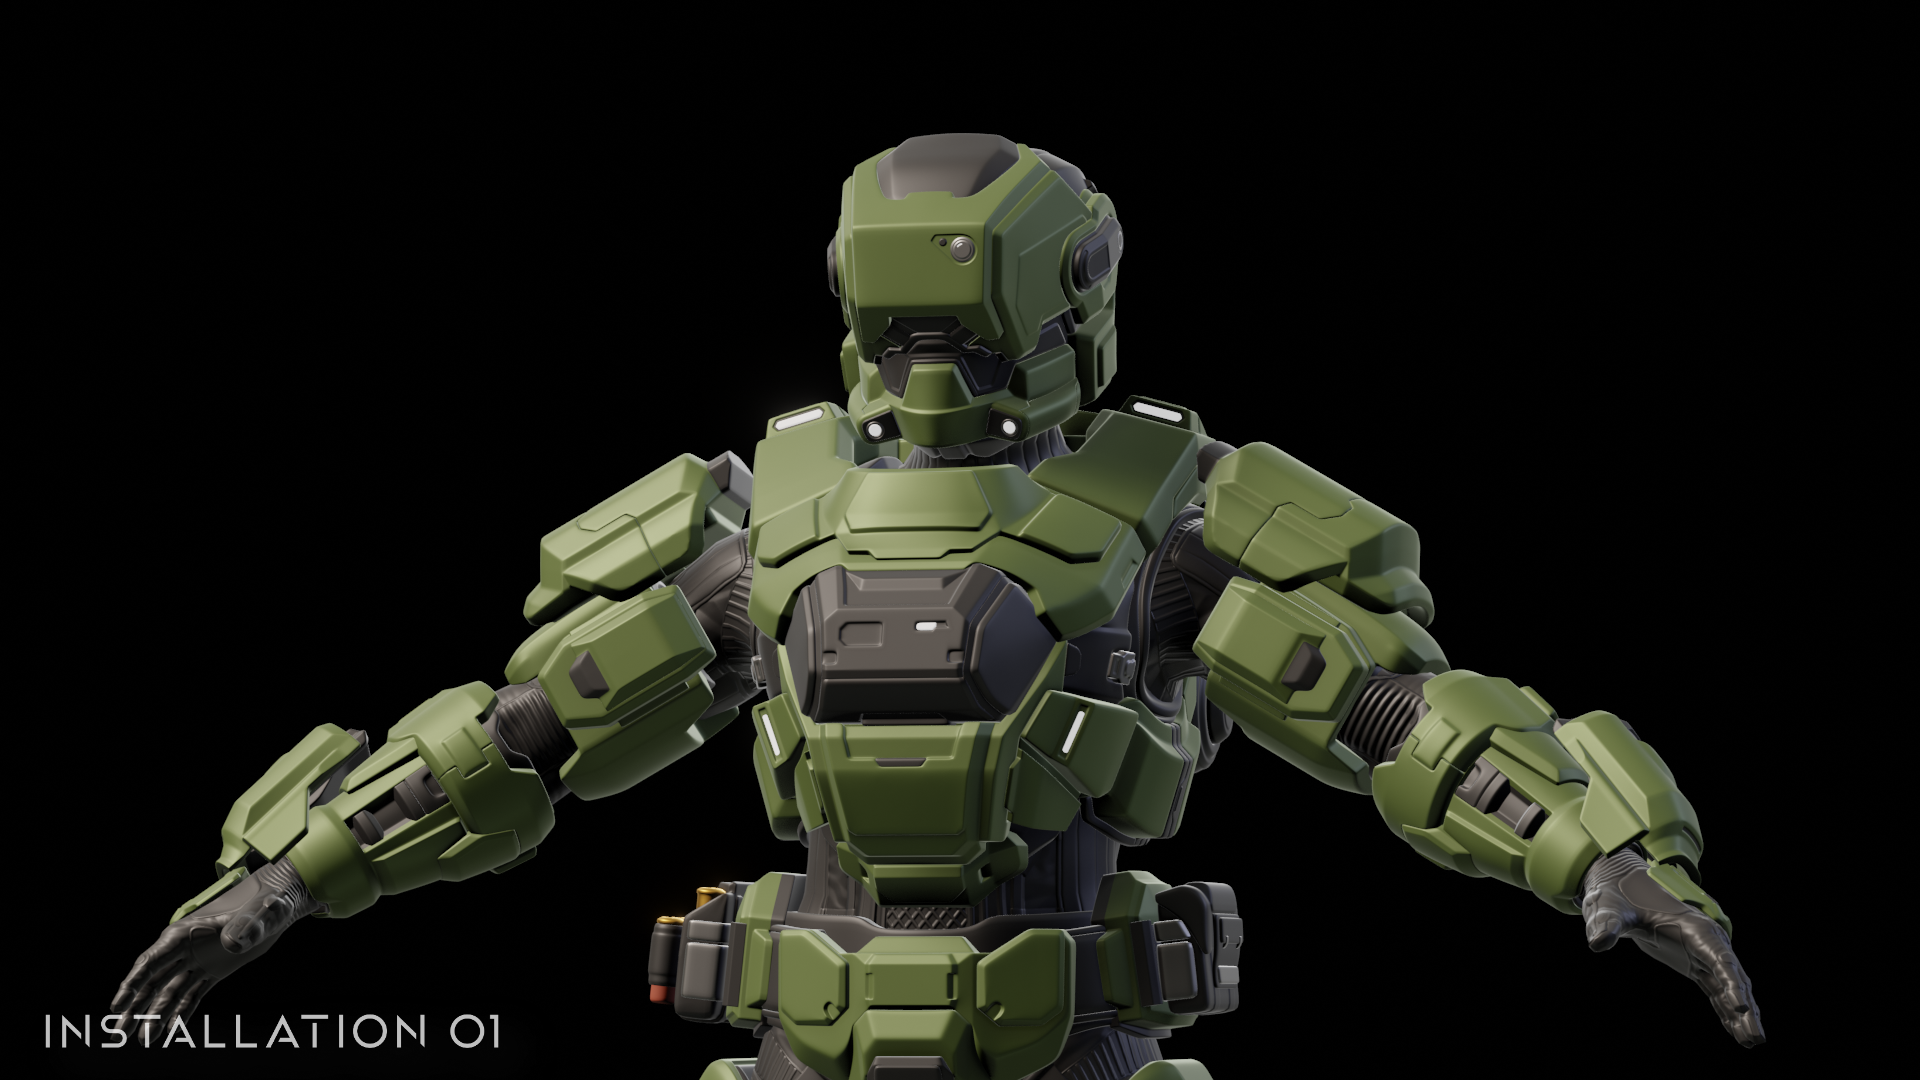
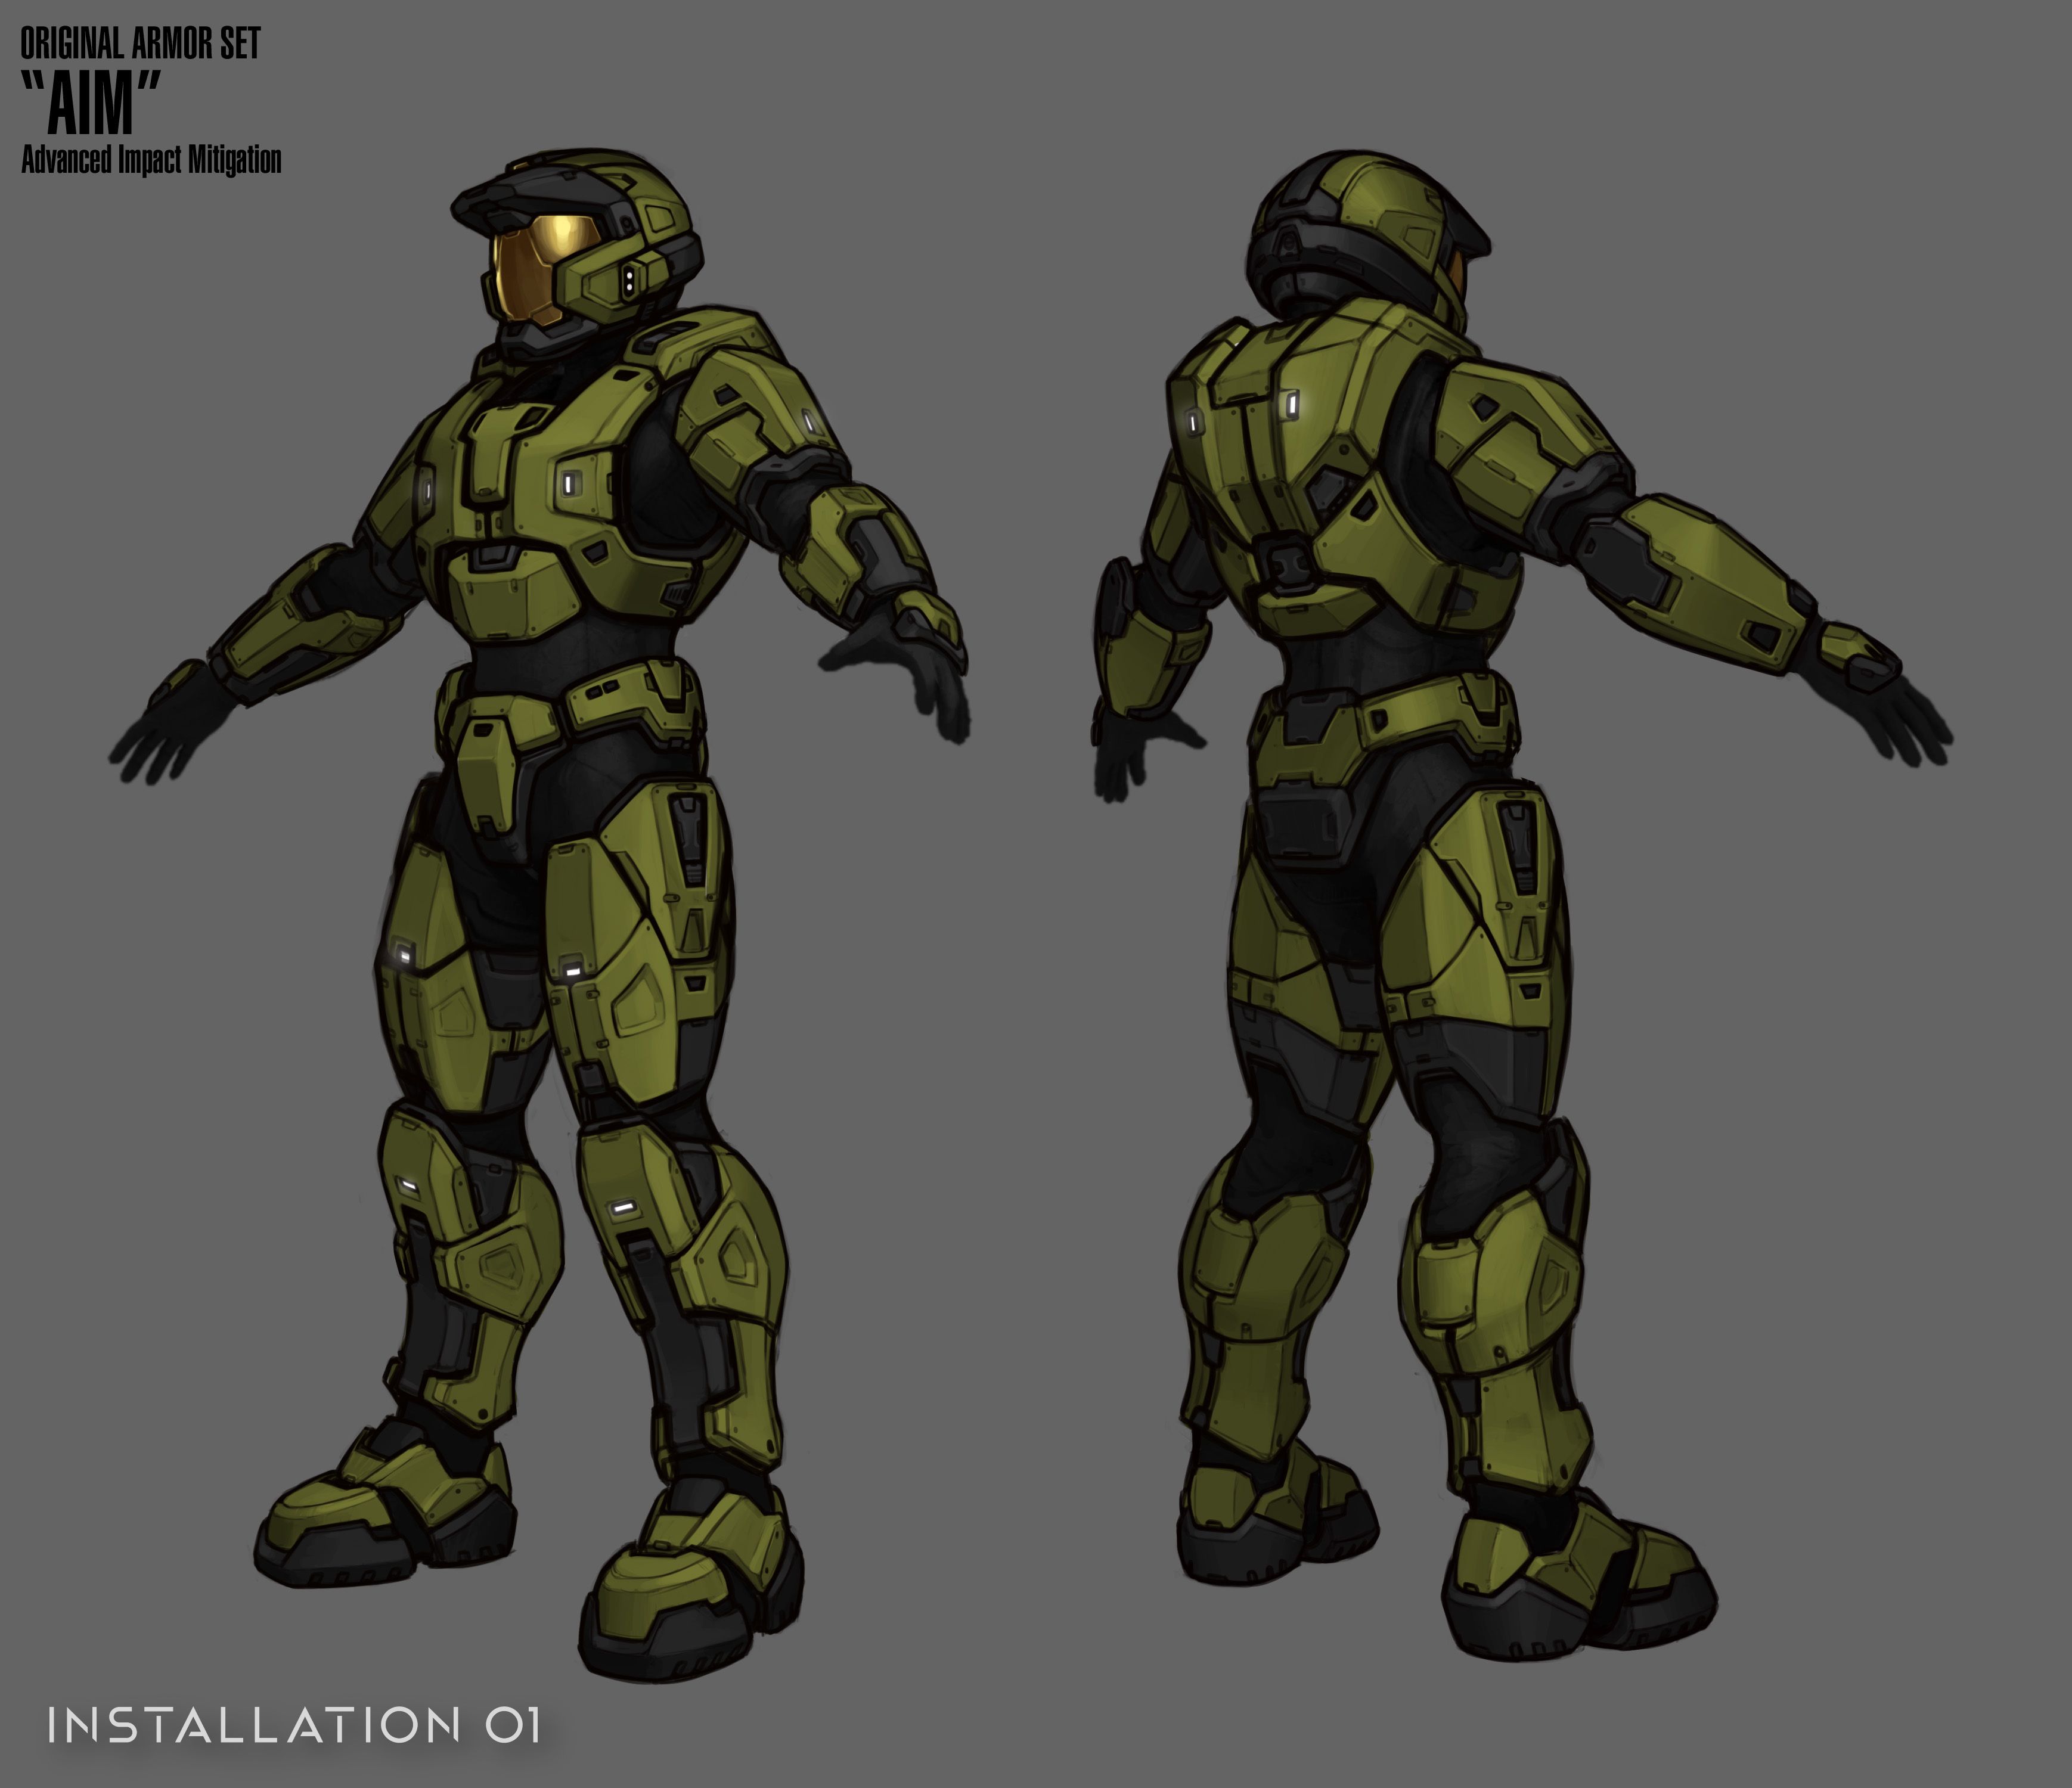
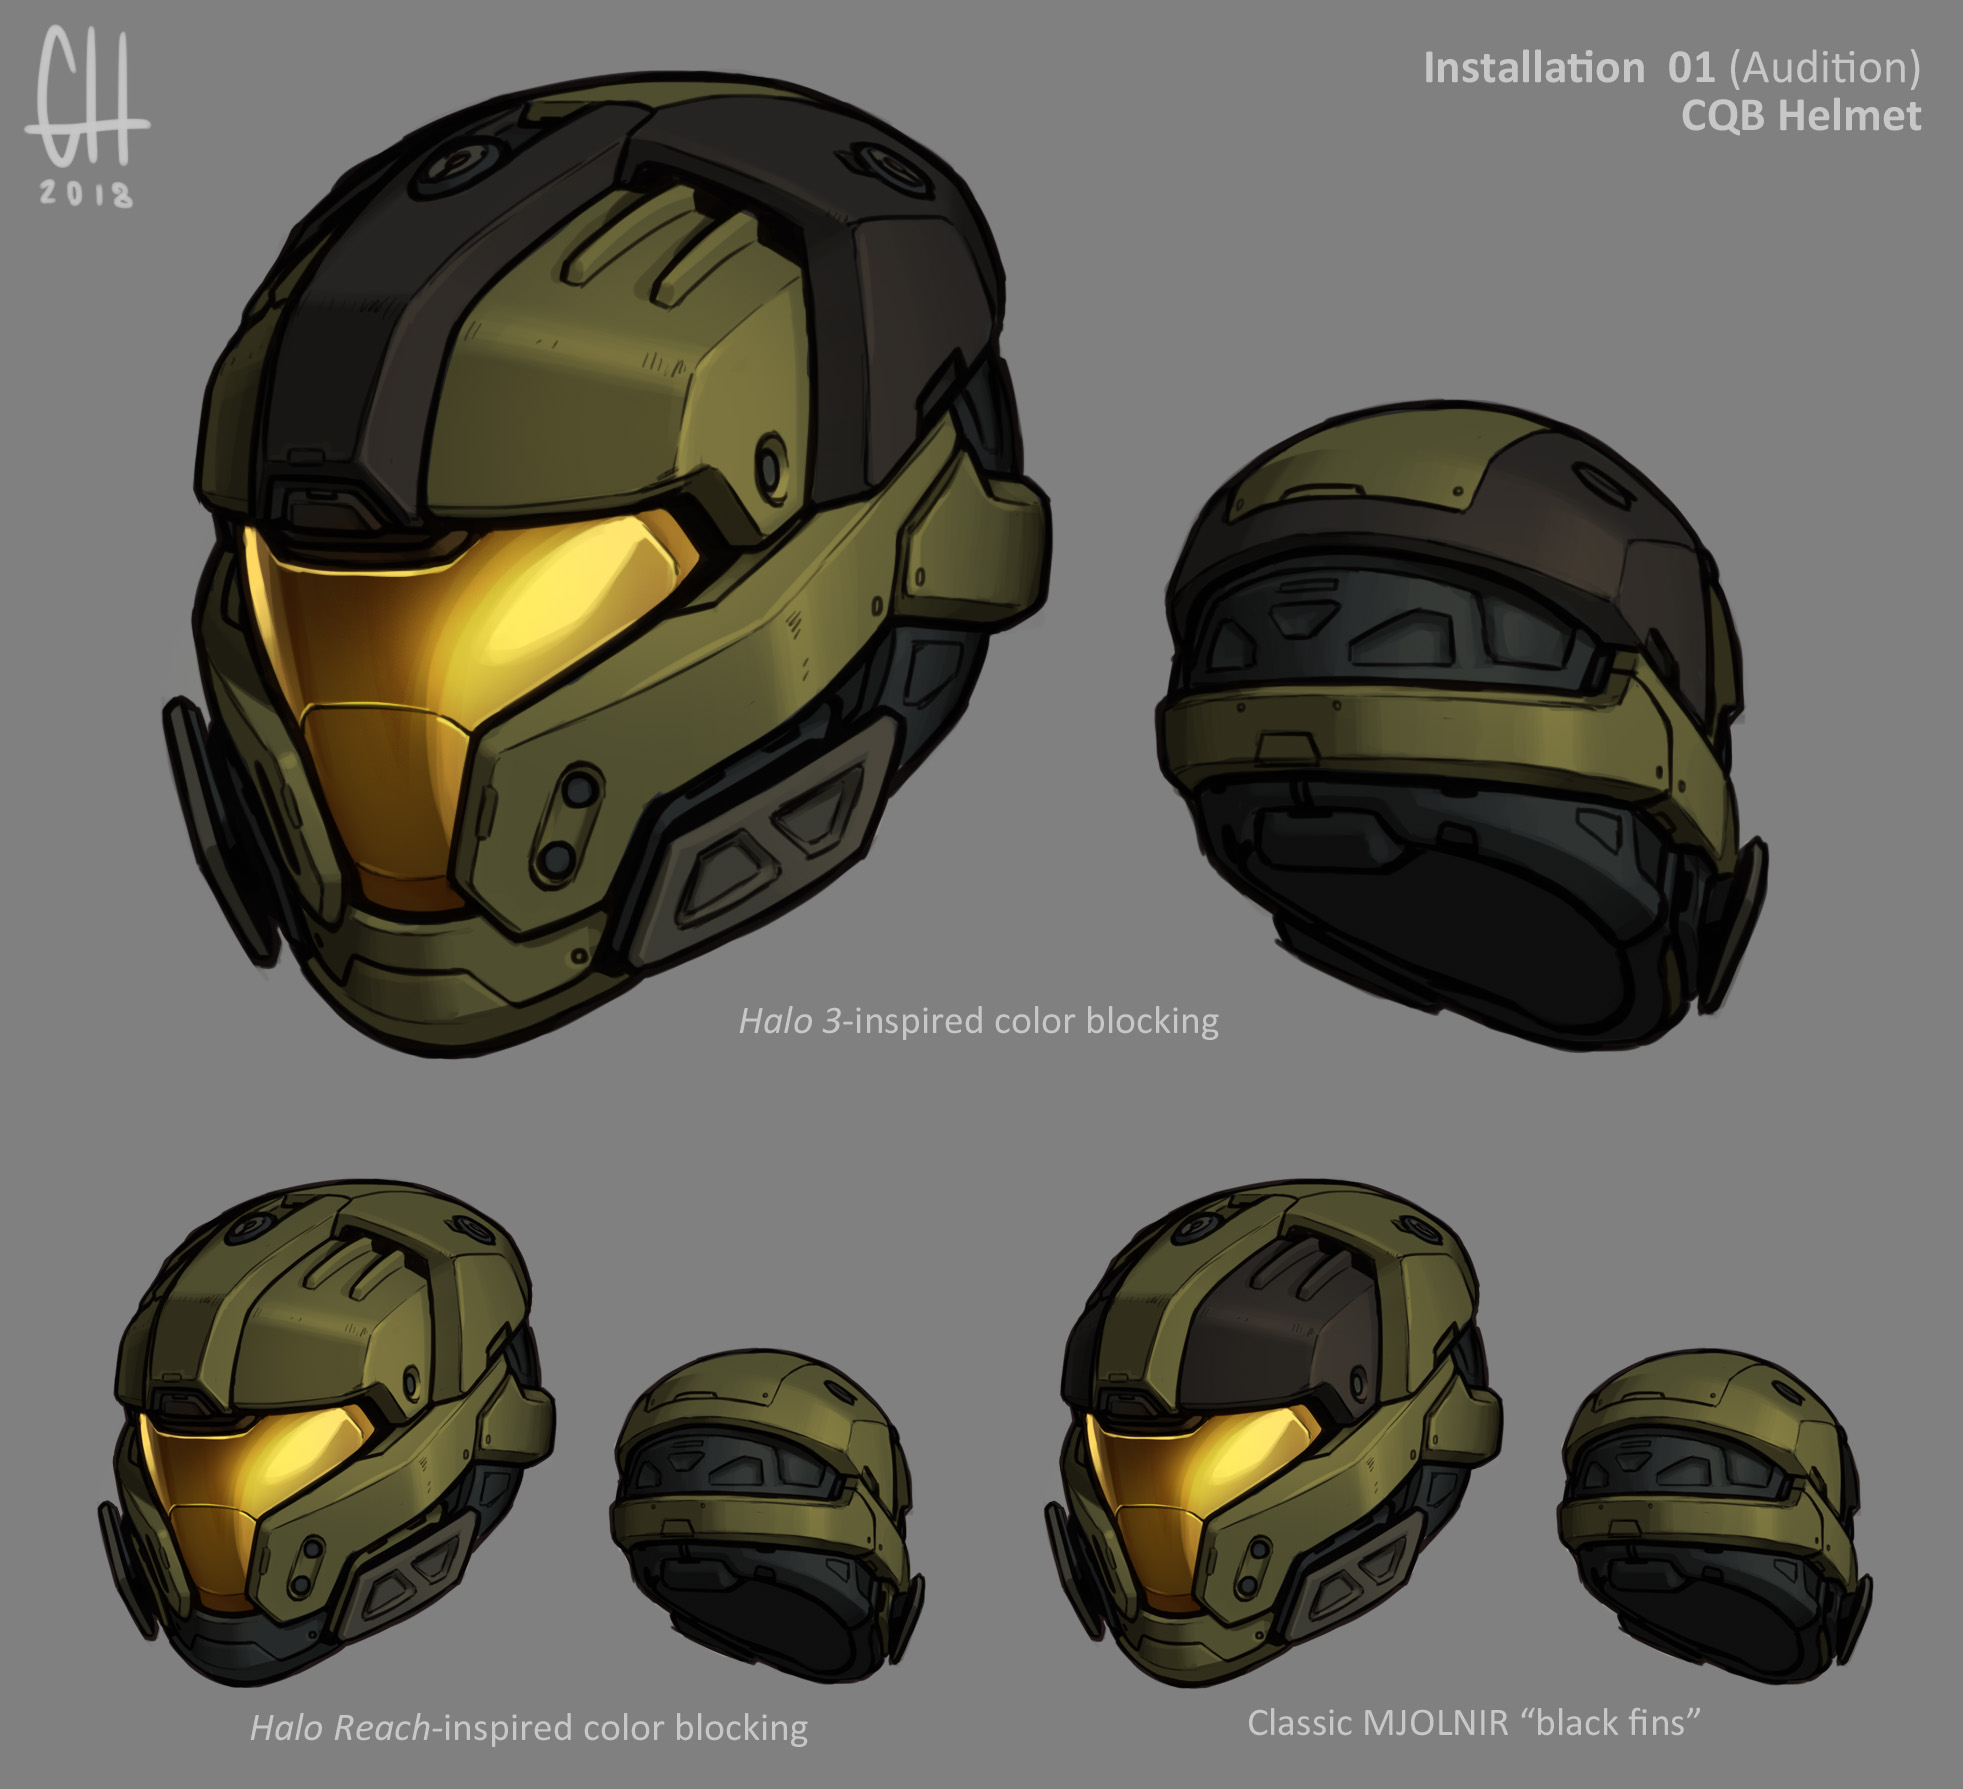
The third item on the menu today is… more armour! That’s right, today you’re getting not just one, not just two, but three sets of armour. The Advanced Impact Mitigation armour, or AIM set, is an original set we’ve had concepted for quite a while, and we’re excited to finally show it off. I spoke with LegendaryGamer, who poured his heart, soul, and other bodily components into the AIM armor set, and asked about his experience working on it.
Just like all previous armour sets on Installation 01, we started out with a concept piece,
this one by the wonderful Tekka Croe. This set is one of our original creations, so it required us to look outside the box a little and experiment with things.
We call it “AIM,” or Advanced Impact Mitigation. It’s similar to EOD, EVA or even CQB in that it has a specific role tied to in-game lore.
One would assume it is closest to CQB in terms of role, or perhaps it’s an experimental set to develop shielding advancements.
Anyways, we’re getting way ahead of ourselves.
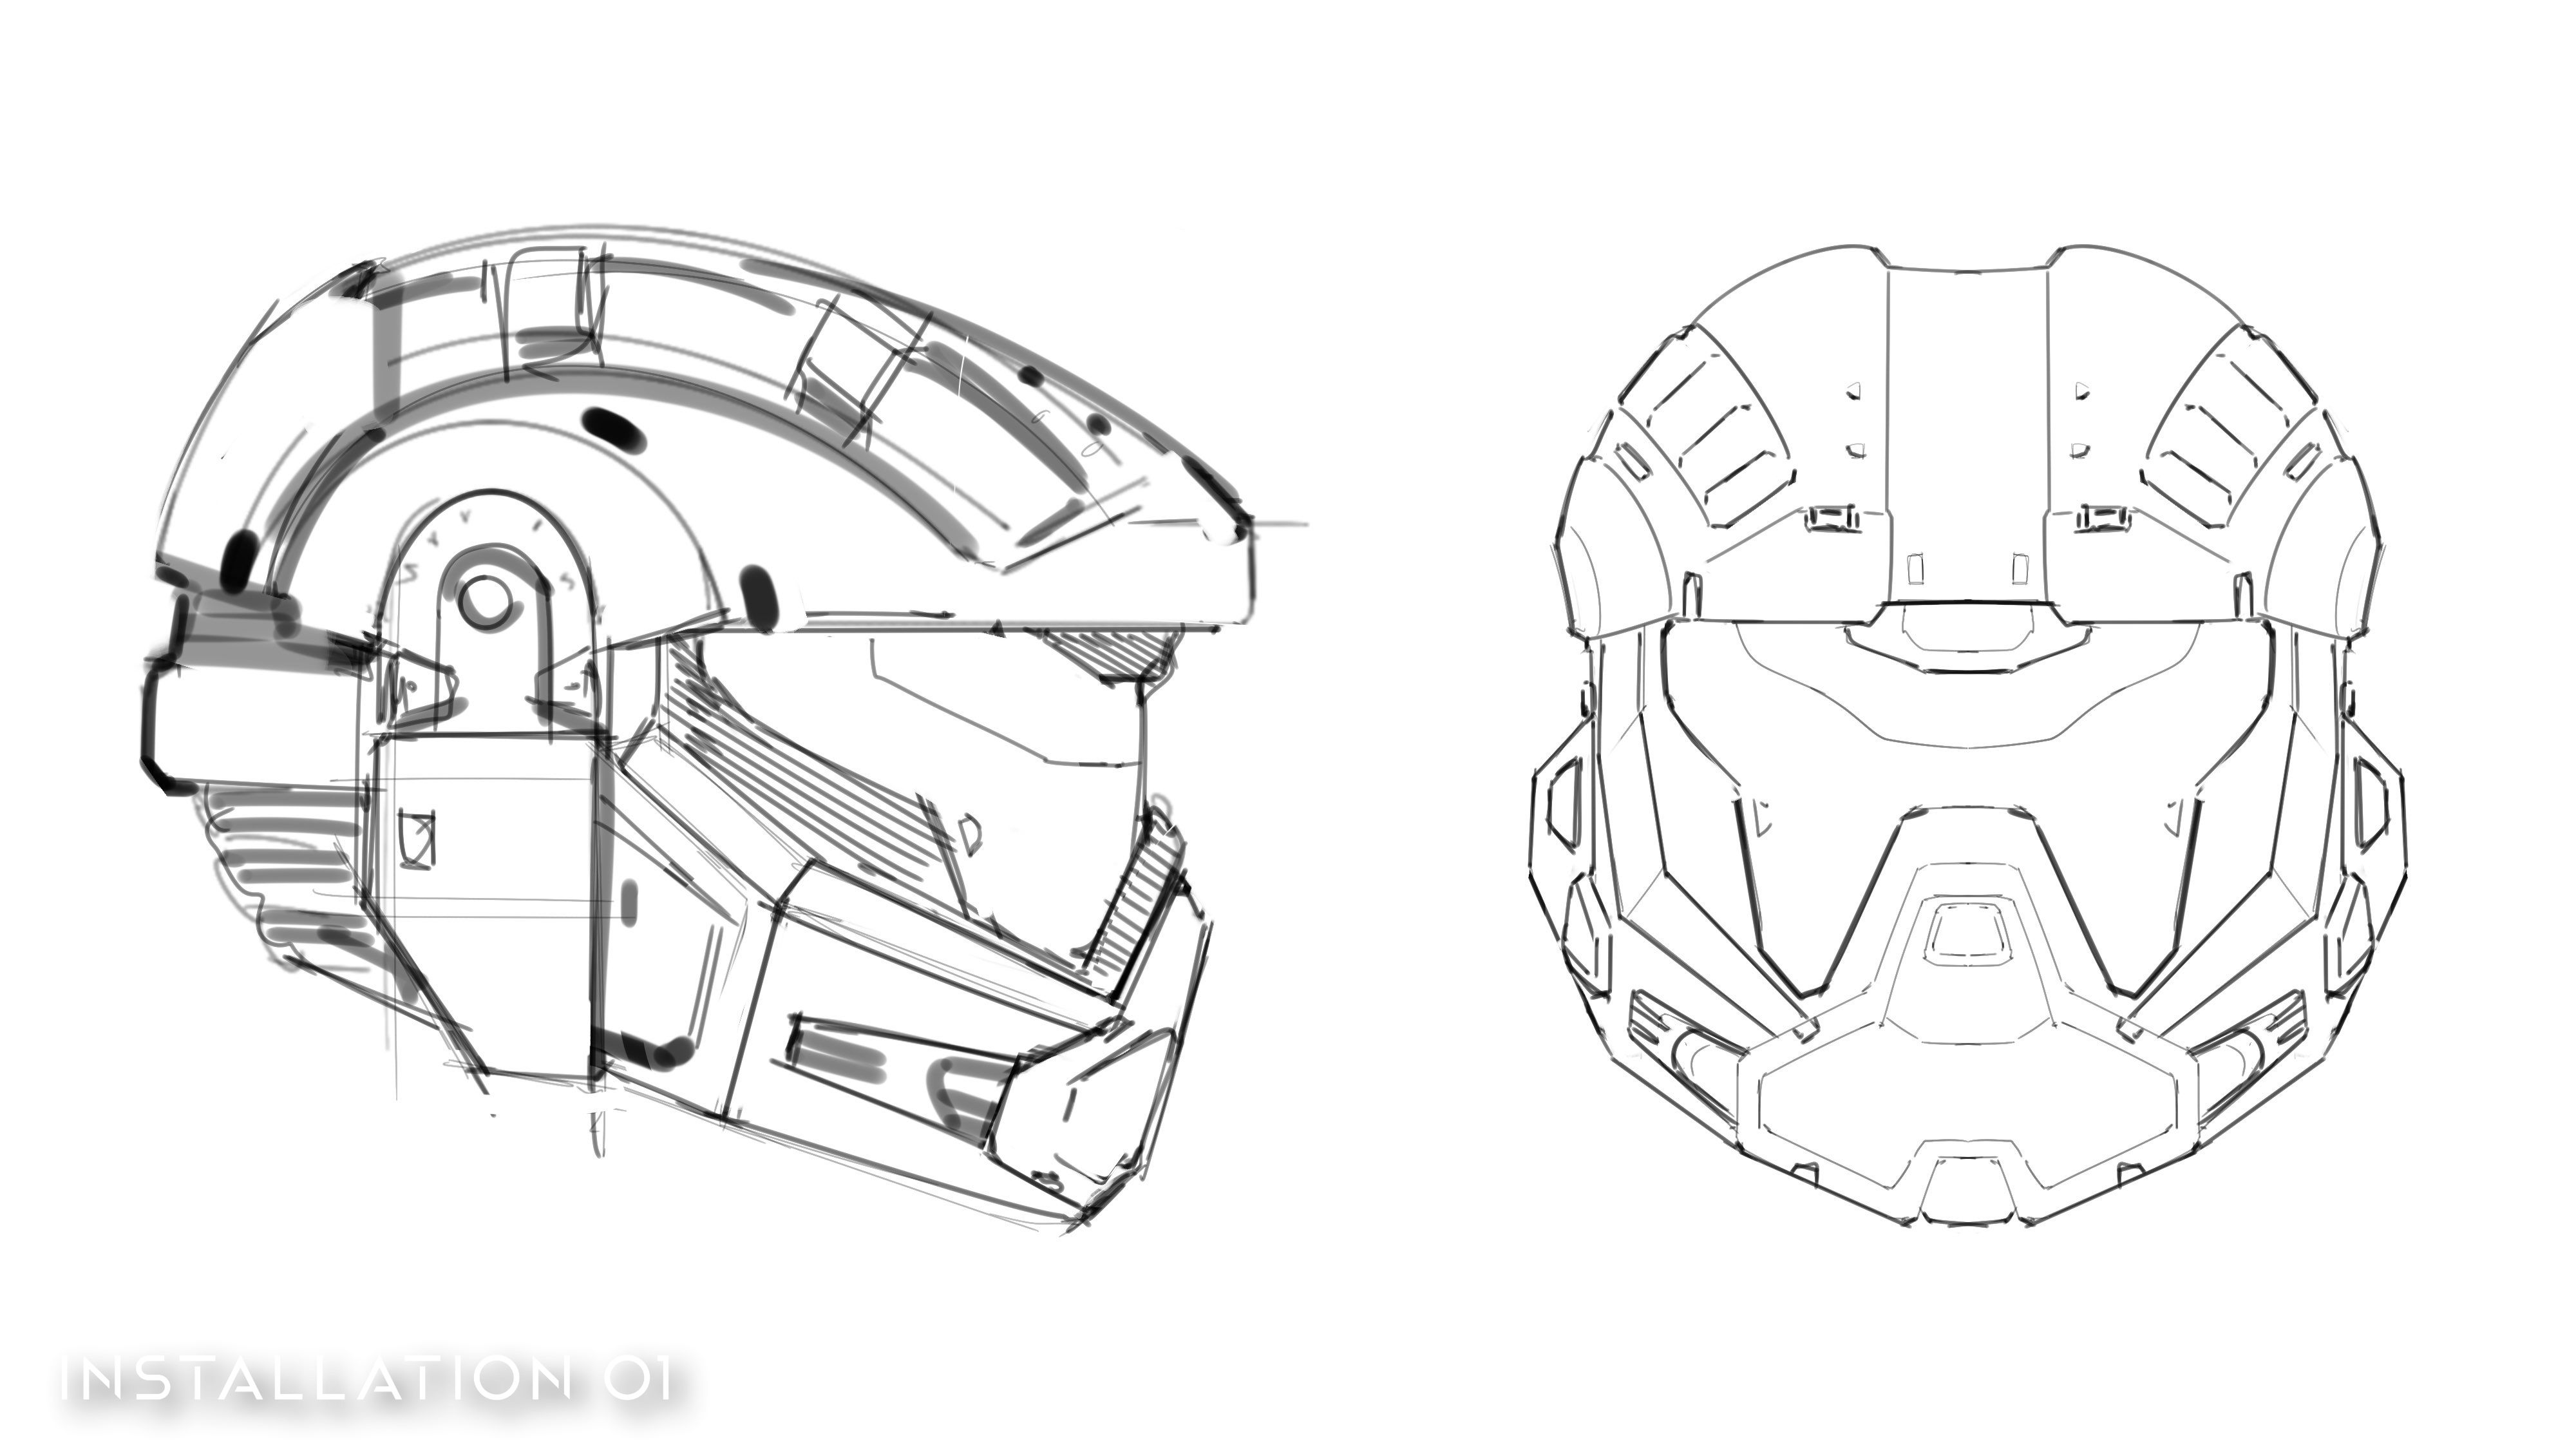
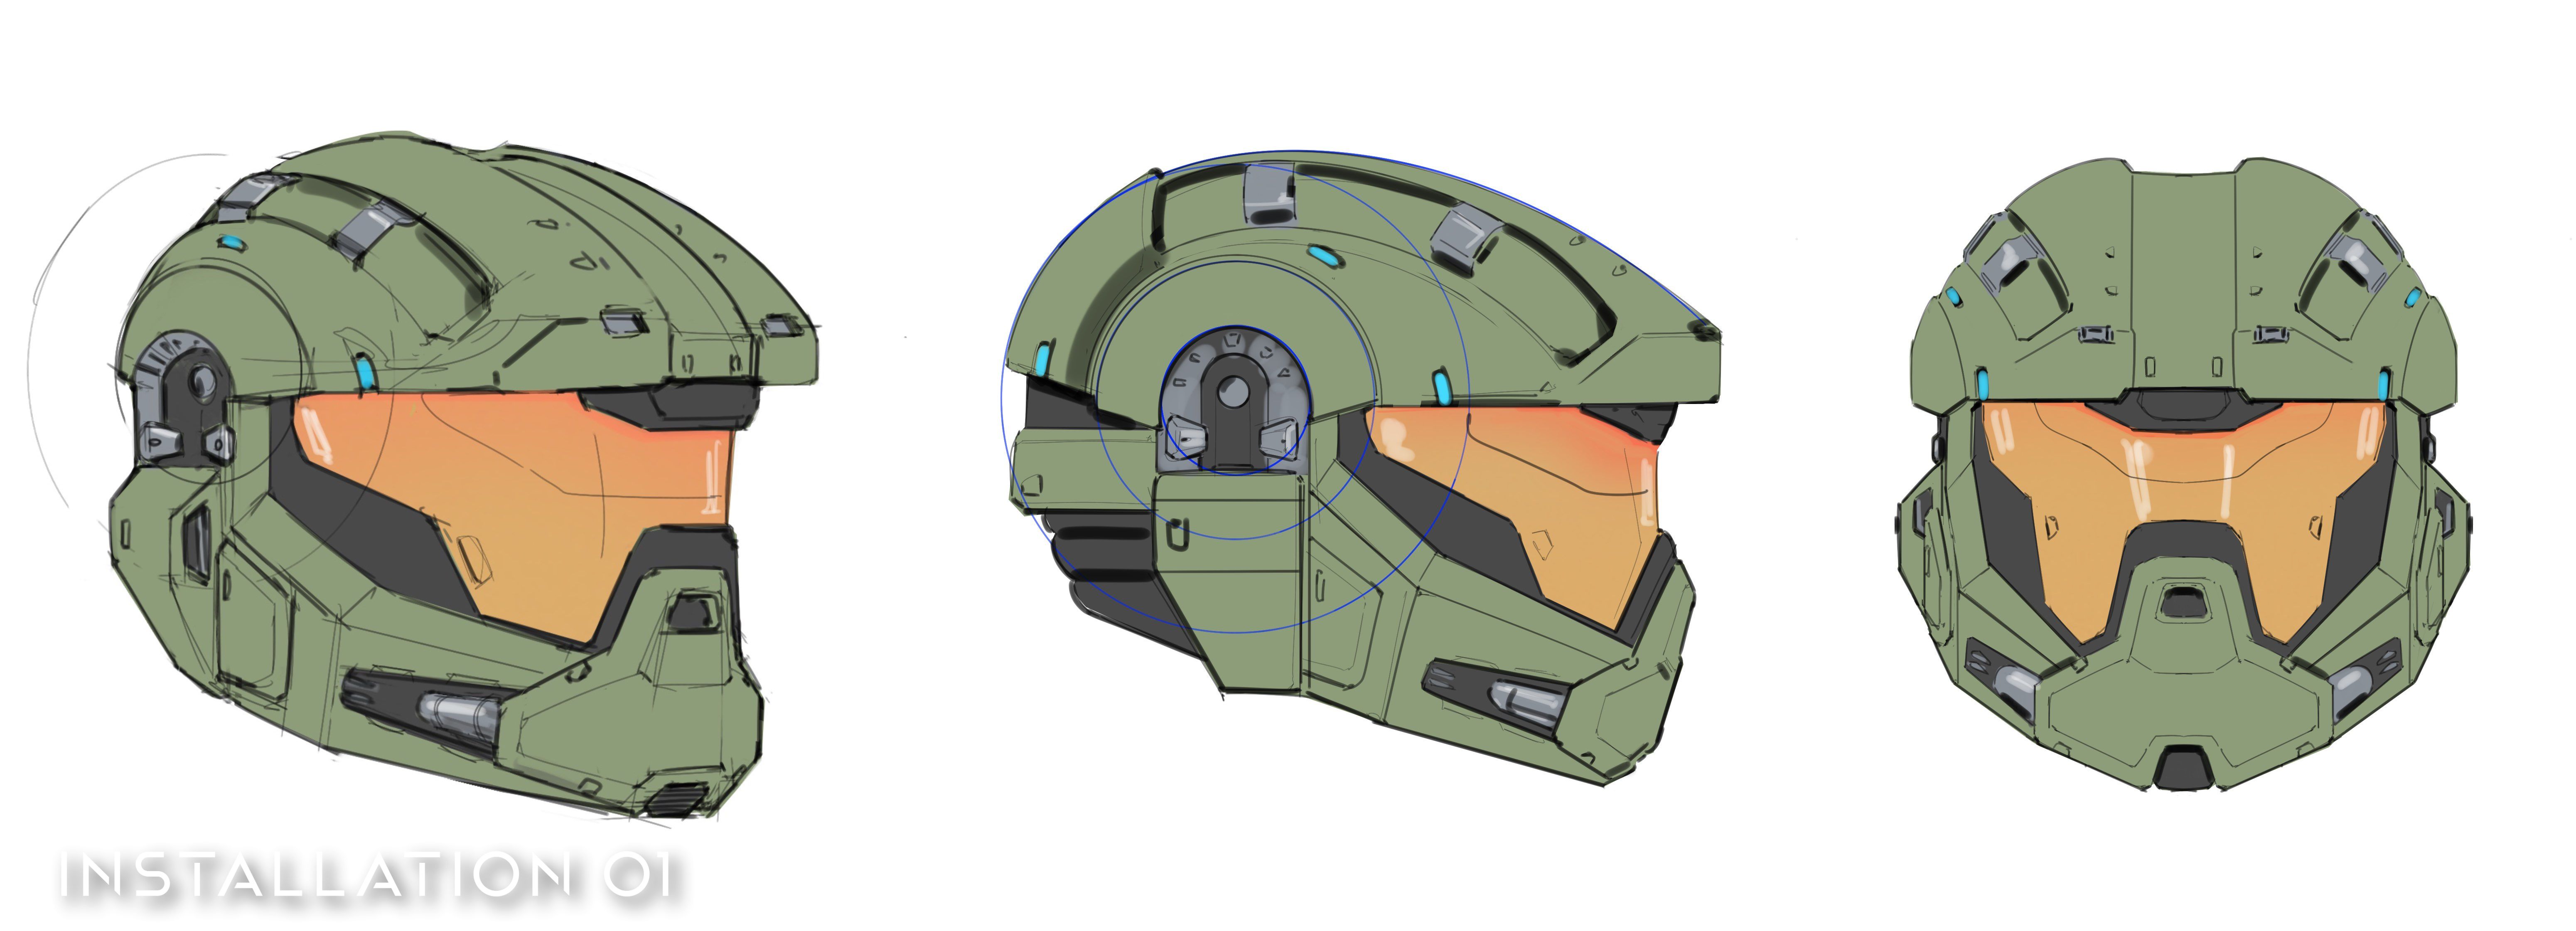
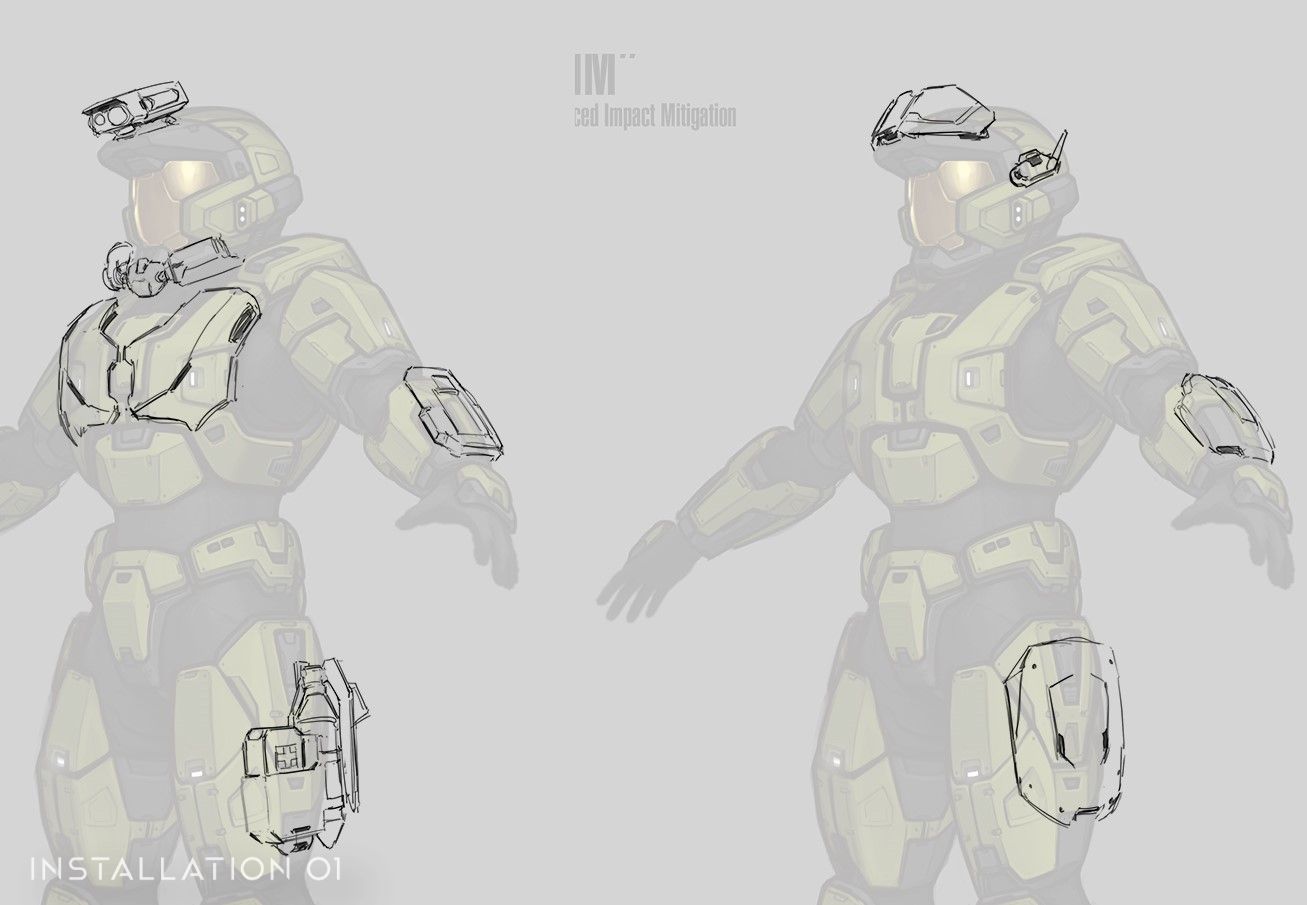
Back to the art side of things, since it was completely unique, we took a cautious approach to its creation by modeling a rough blockout in ZBrush
to get the basic shapes perfect before moving onto the next stage.
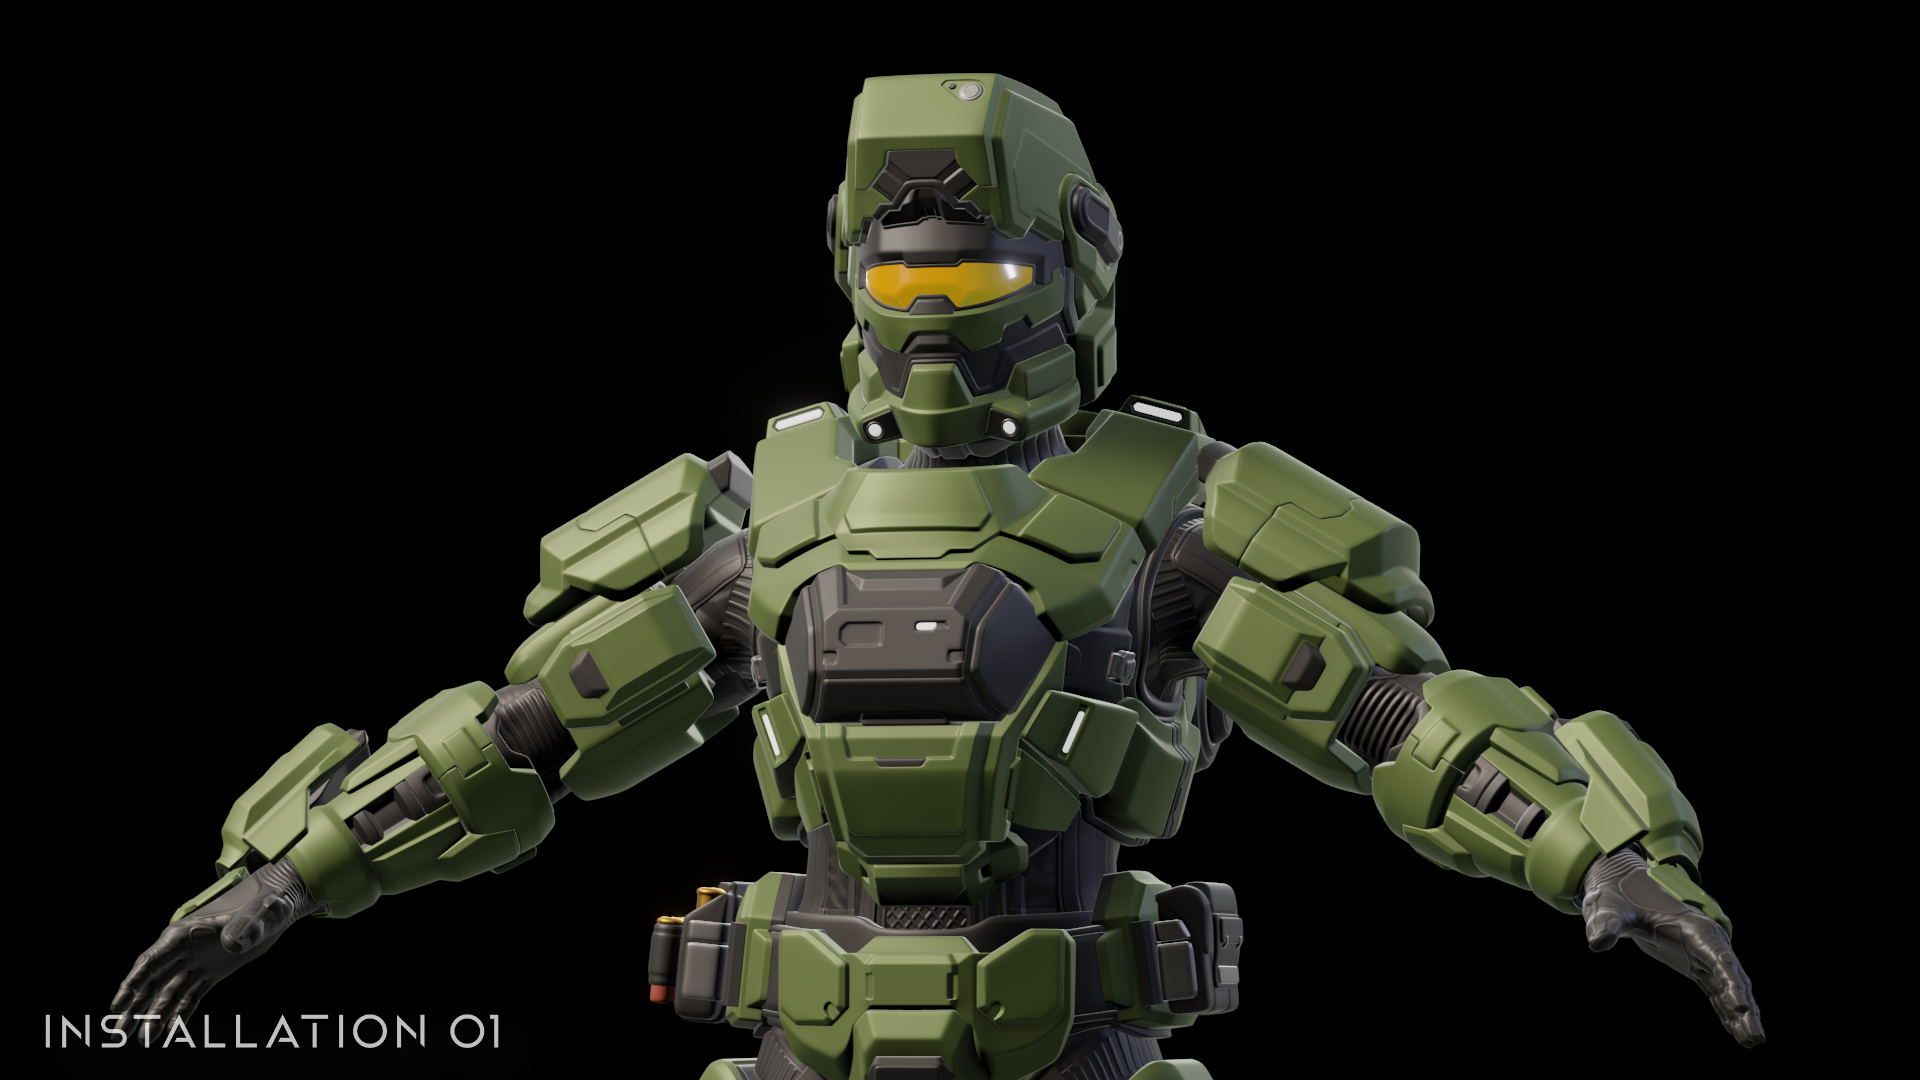
Surprisingly, during this stage we decided to do a 180 pivot and changed the helmet design quite drastically even
if we squished his face upwards - it lets him aim further! Once this design was finalized,
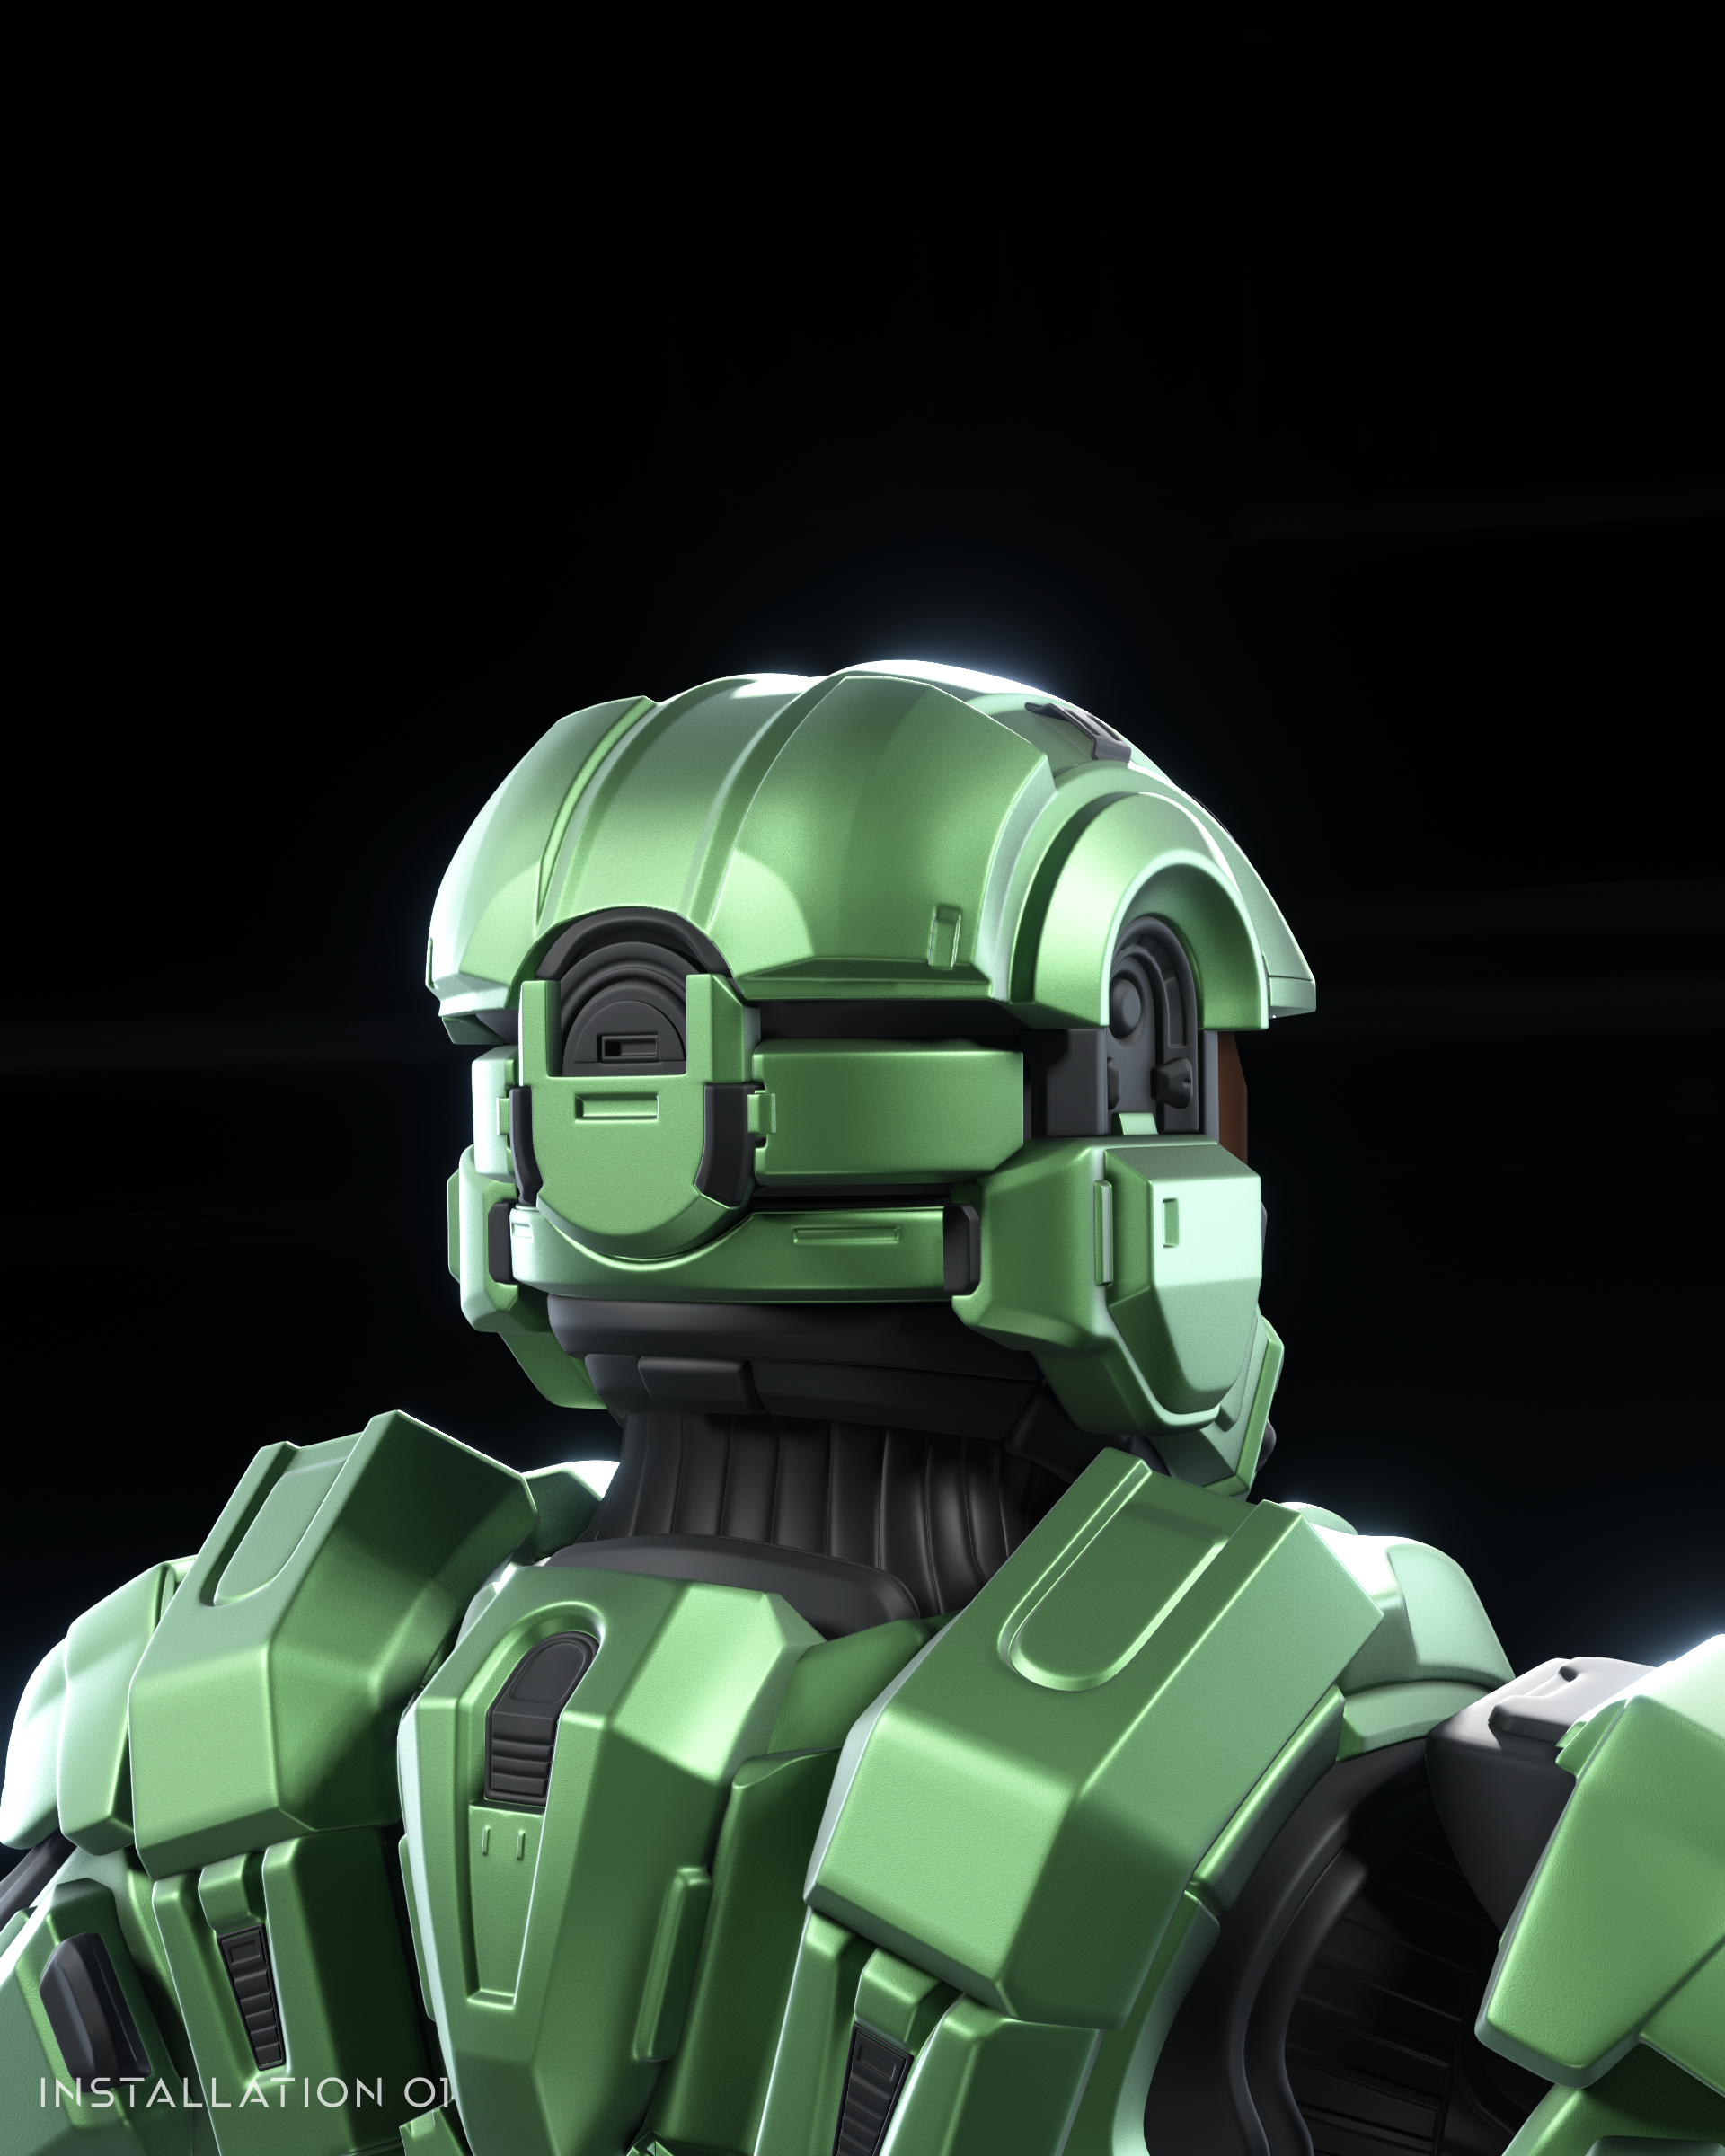
it was sent to blender and retopologized using cleaner and less non-destructive workflows.
At one point during this stage, I felt it right to redo the high poly purely in blender as I became more accustomed to the program. I used some boolean workflows to speed up that process and I also took the time to use this asset to learn a decal-heavy workflow. We ultimately decided to not use decals for our armour sets and instead opted for a high > low baking policy since it gave us way more control over the details. This was a very good learning experience for me since our vehicles will eventually use this same workflow. For now, only our environment assets and maps will utilize this sort of workflow while we figure out engine requirements for the aforementioned workflow usage!

This needed more aiming-related puns. Oh well, at least the impact of the armour’s sheer excellence was enough to mitigate the need for advanced jokes. This is truly a legendary set, and if it’s any indicator of what we can do for original armour, then I’m excited to see what else we may have in the future.
THERE’S A LEEK IN MY BOOT!
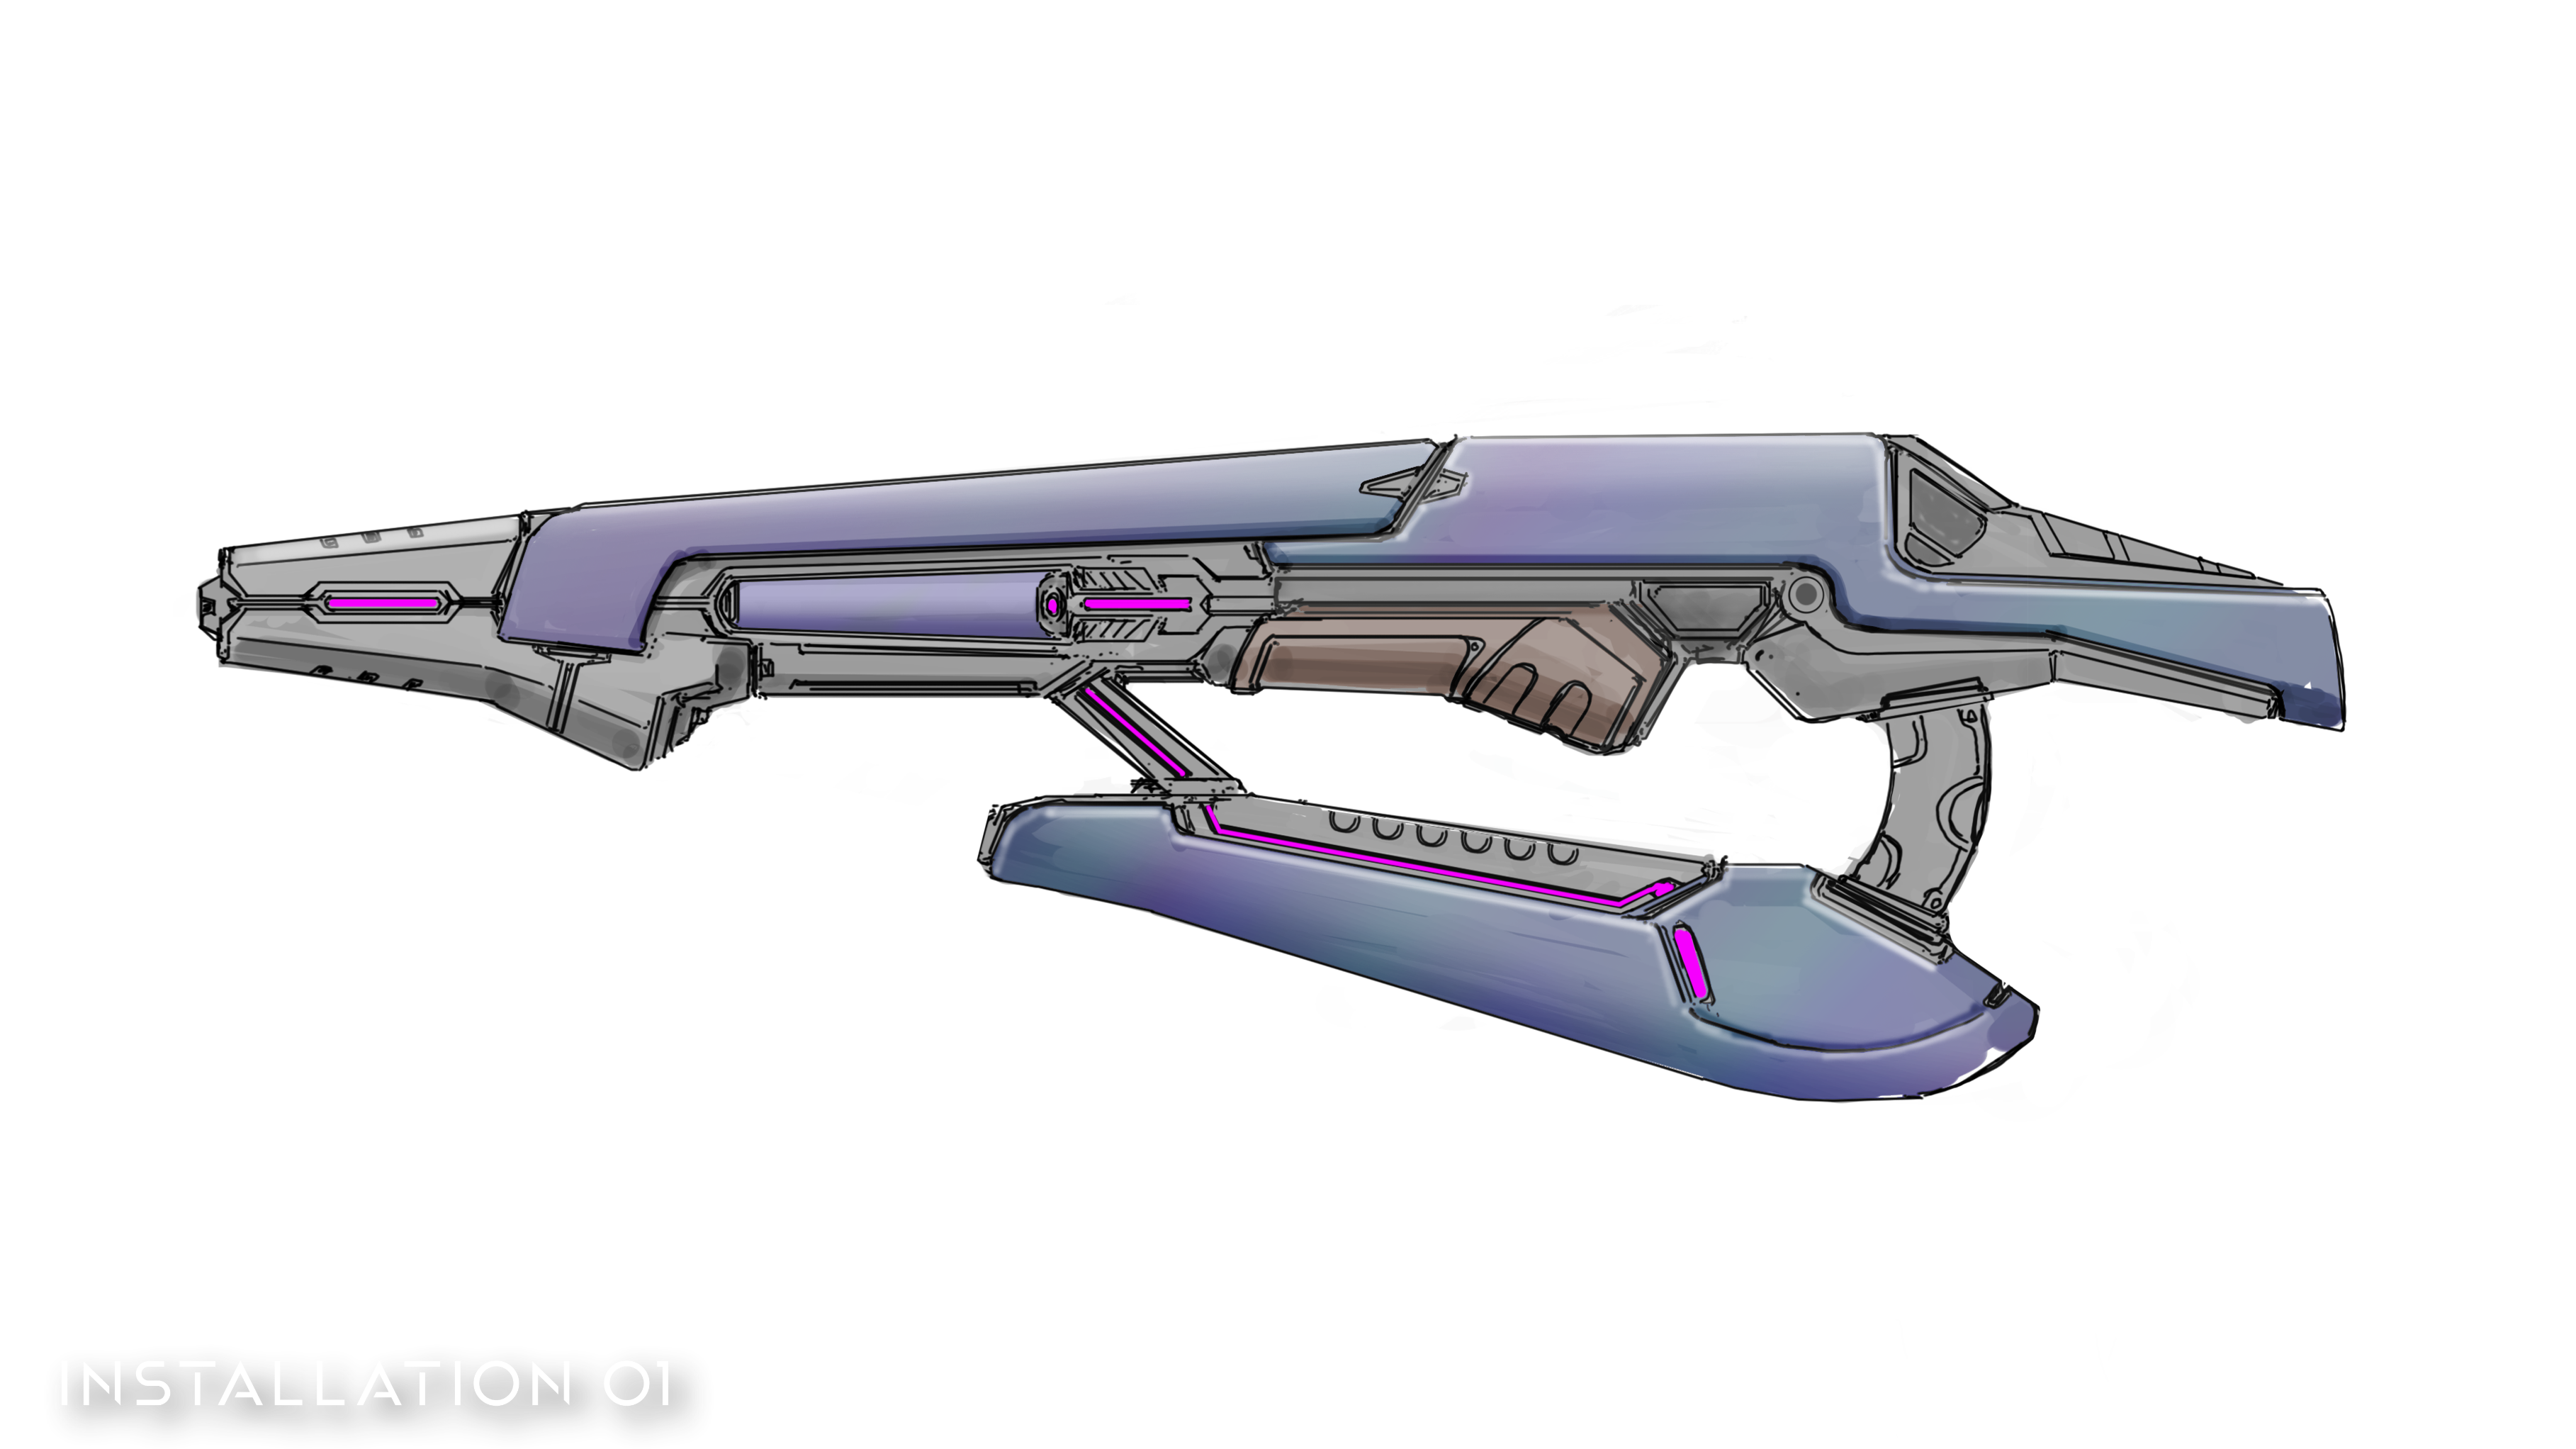
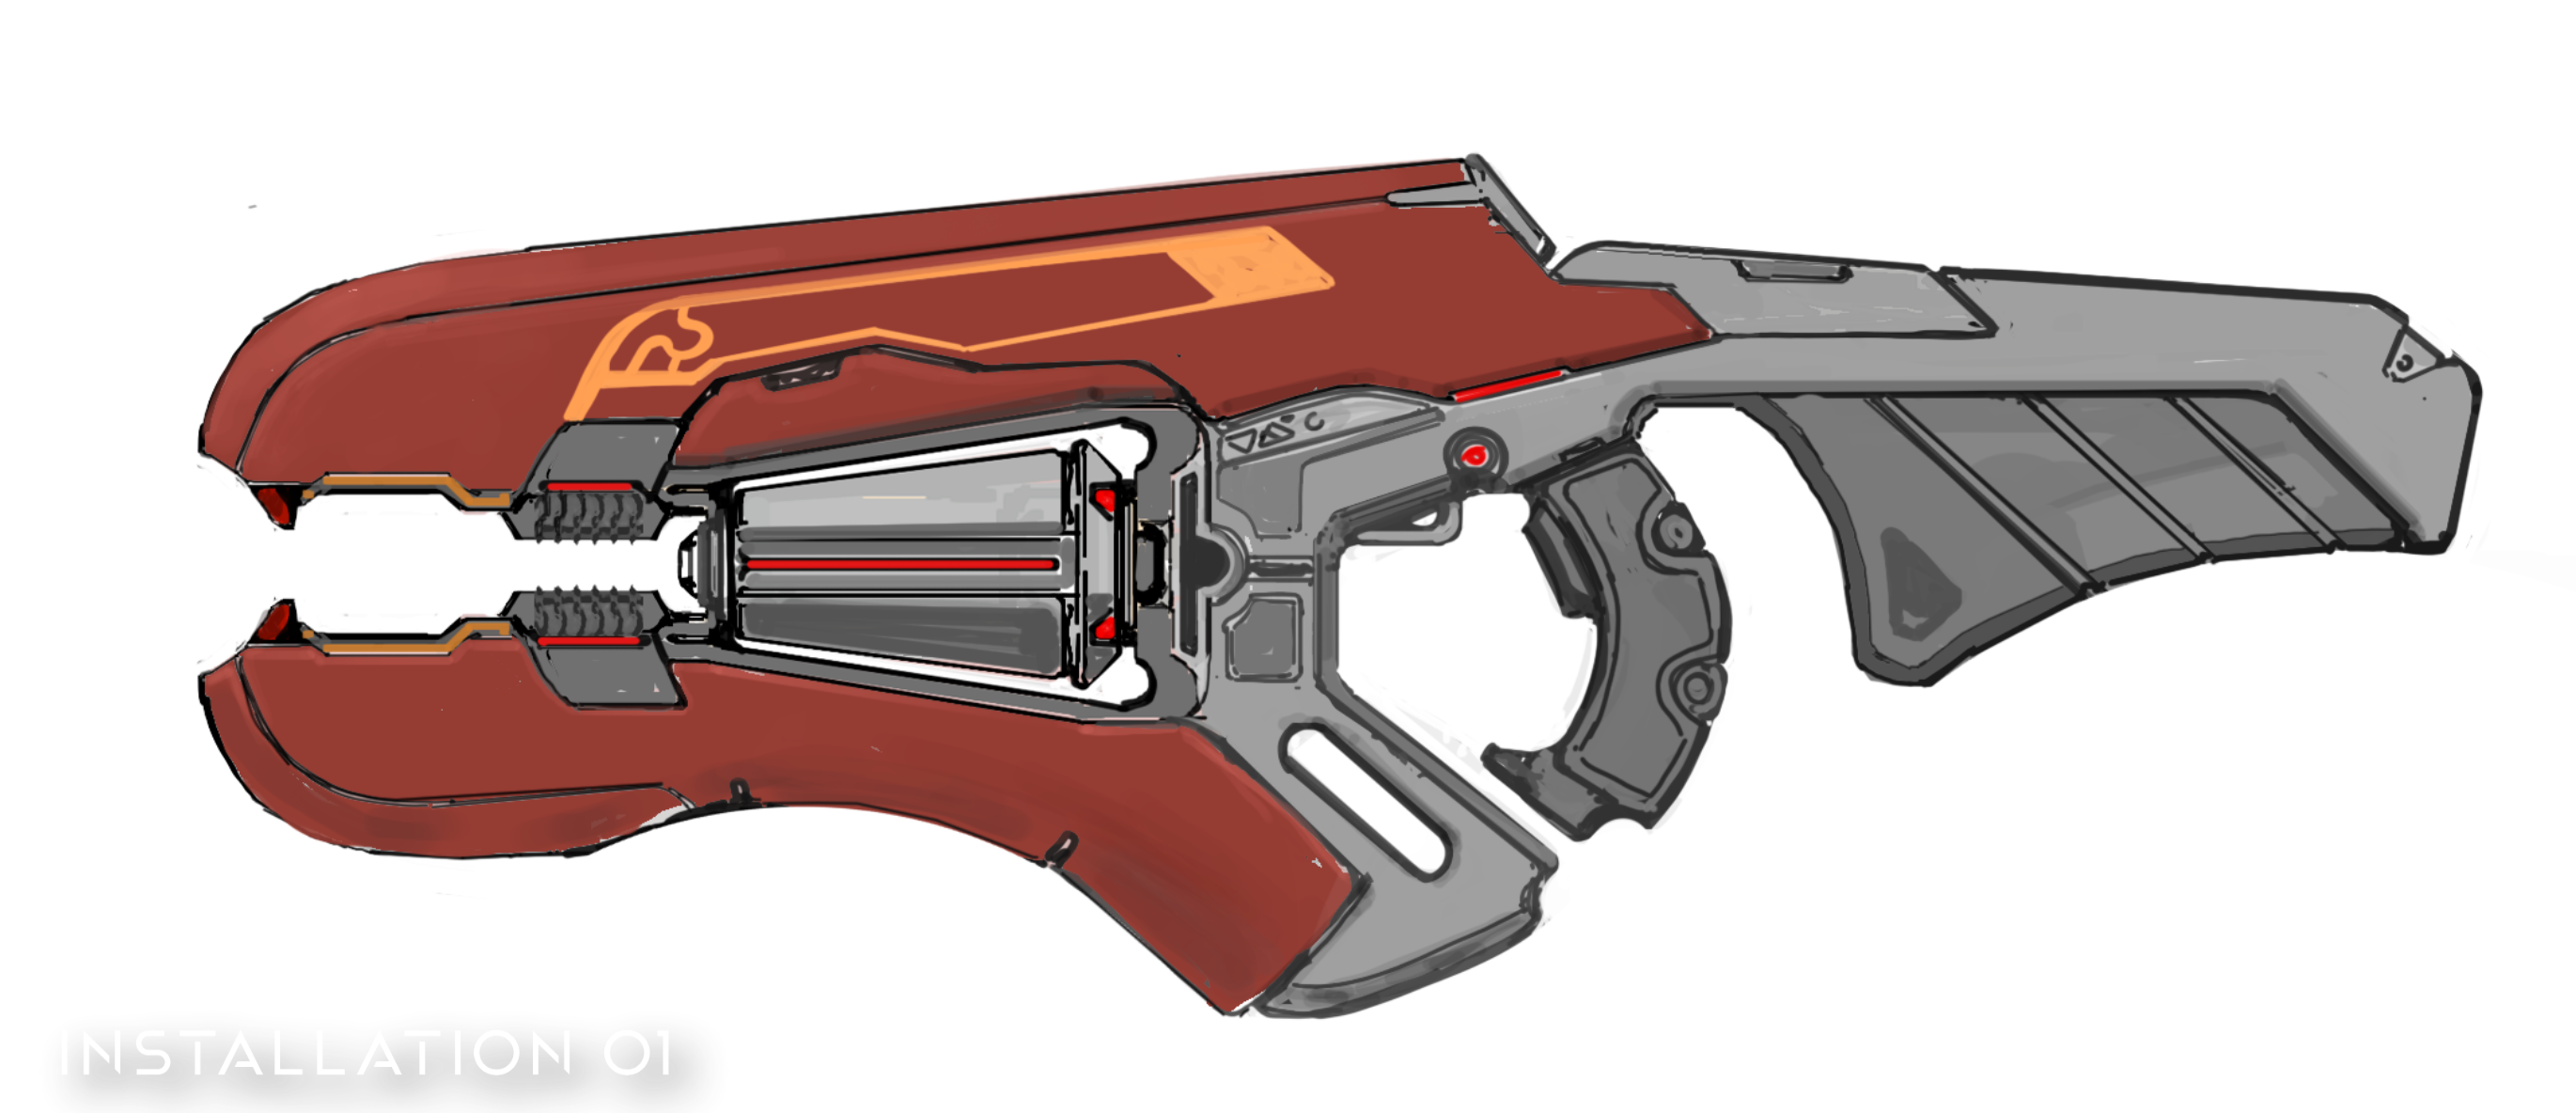
Despite us having no update for the last couple of months, Pat and Sam kept showing off the various art concepts we’ve done. You should recognize a couple of these. Bonus points may be included if you can name the origin of that cool-lookin’ sniper.

STATE OF THE GAME
I meant to ask during March how you’re all enjoying the new public roadmap.
We made some minor adjustments to it to make it a little easier to follow.
Personally, I think the roadmap. is exciting. It spurs your imaginations and forces you to ask big questions.
The roadmap - it affects us all, and it connects us all.
Right now, here is what we have in store for the roadmap. going forward:
Completed
- Roadmap - Added Completed section to display completed tasks.
- Roadmap - Subtasks are now crossed out upon completion.
- Roadmap - Fixed bug where arrows were not animated when clicked/tapped.
Actively In Development
- Roadmap - Adding and Updating Tasks
- Roadmap - Display Task Information
In Backlog/Pending Further Discussion
- Roadmap - Subtask Status
If you have any suggestions to help us improve the roadmap, please let us know on Twitter, Reddit, or on our Discord server. If you just want to check out the roadmap. itself and see where development is comfortably sitting, click that button in the nav bar, or just click one of the hyper-convenient hyperlinks I’ve thrown around.
NO ARMOUR WITHOUT ‘U’
Speaking of clicking links, I am obligated to mention that we’re still looking for more free labour. If you have any skills related to game development, creation of art assets, or just programming in general, and you have time to spare, click this fancy-coloured button.
Join the i01 TeamIf you don’t have any of those skills and you’re just waiting to play, don’t worry, you still mean something to us. Installation 01 would be nothing without the support and excitement of everyone waiting. Keep supporting and exciting us, and if you ever find it in your myocardium to learn how to chain if and else together and join us, we’ll welcome you with experience and exposure.
Please let us know on Twitter
or Reddit what you think about the new armour sets!
We plan on releasing some renders of these new sets and some of our older sets that just got texture updates,
so keep an eye out for these. The update banner is only the teaser.
By the way, a certain dragon just informed me that we recently hit the first milestone of 2D rendering in the Plasma Engine.
Our entire renderer has been getting an overhaul, so this is great news.
If you wish to read more about it, Josh recently posted an update regarding the plans for the engine’s development.
There is still a long way to go, but depending on how occupied the programmers are with their day jobs during June,
we may or may not see some exciting engine developments next month.
As unassuring as that sounds, fan project development really do be like that.
We’ll do our best to keep you updated so you know what’s going on here inside the Installation of the 01.
Hasta la vista, baby.
Tim

Reddit Comments
View all comments